the blog


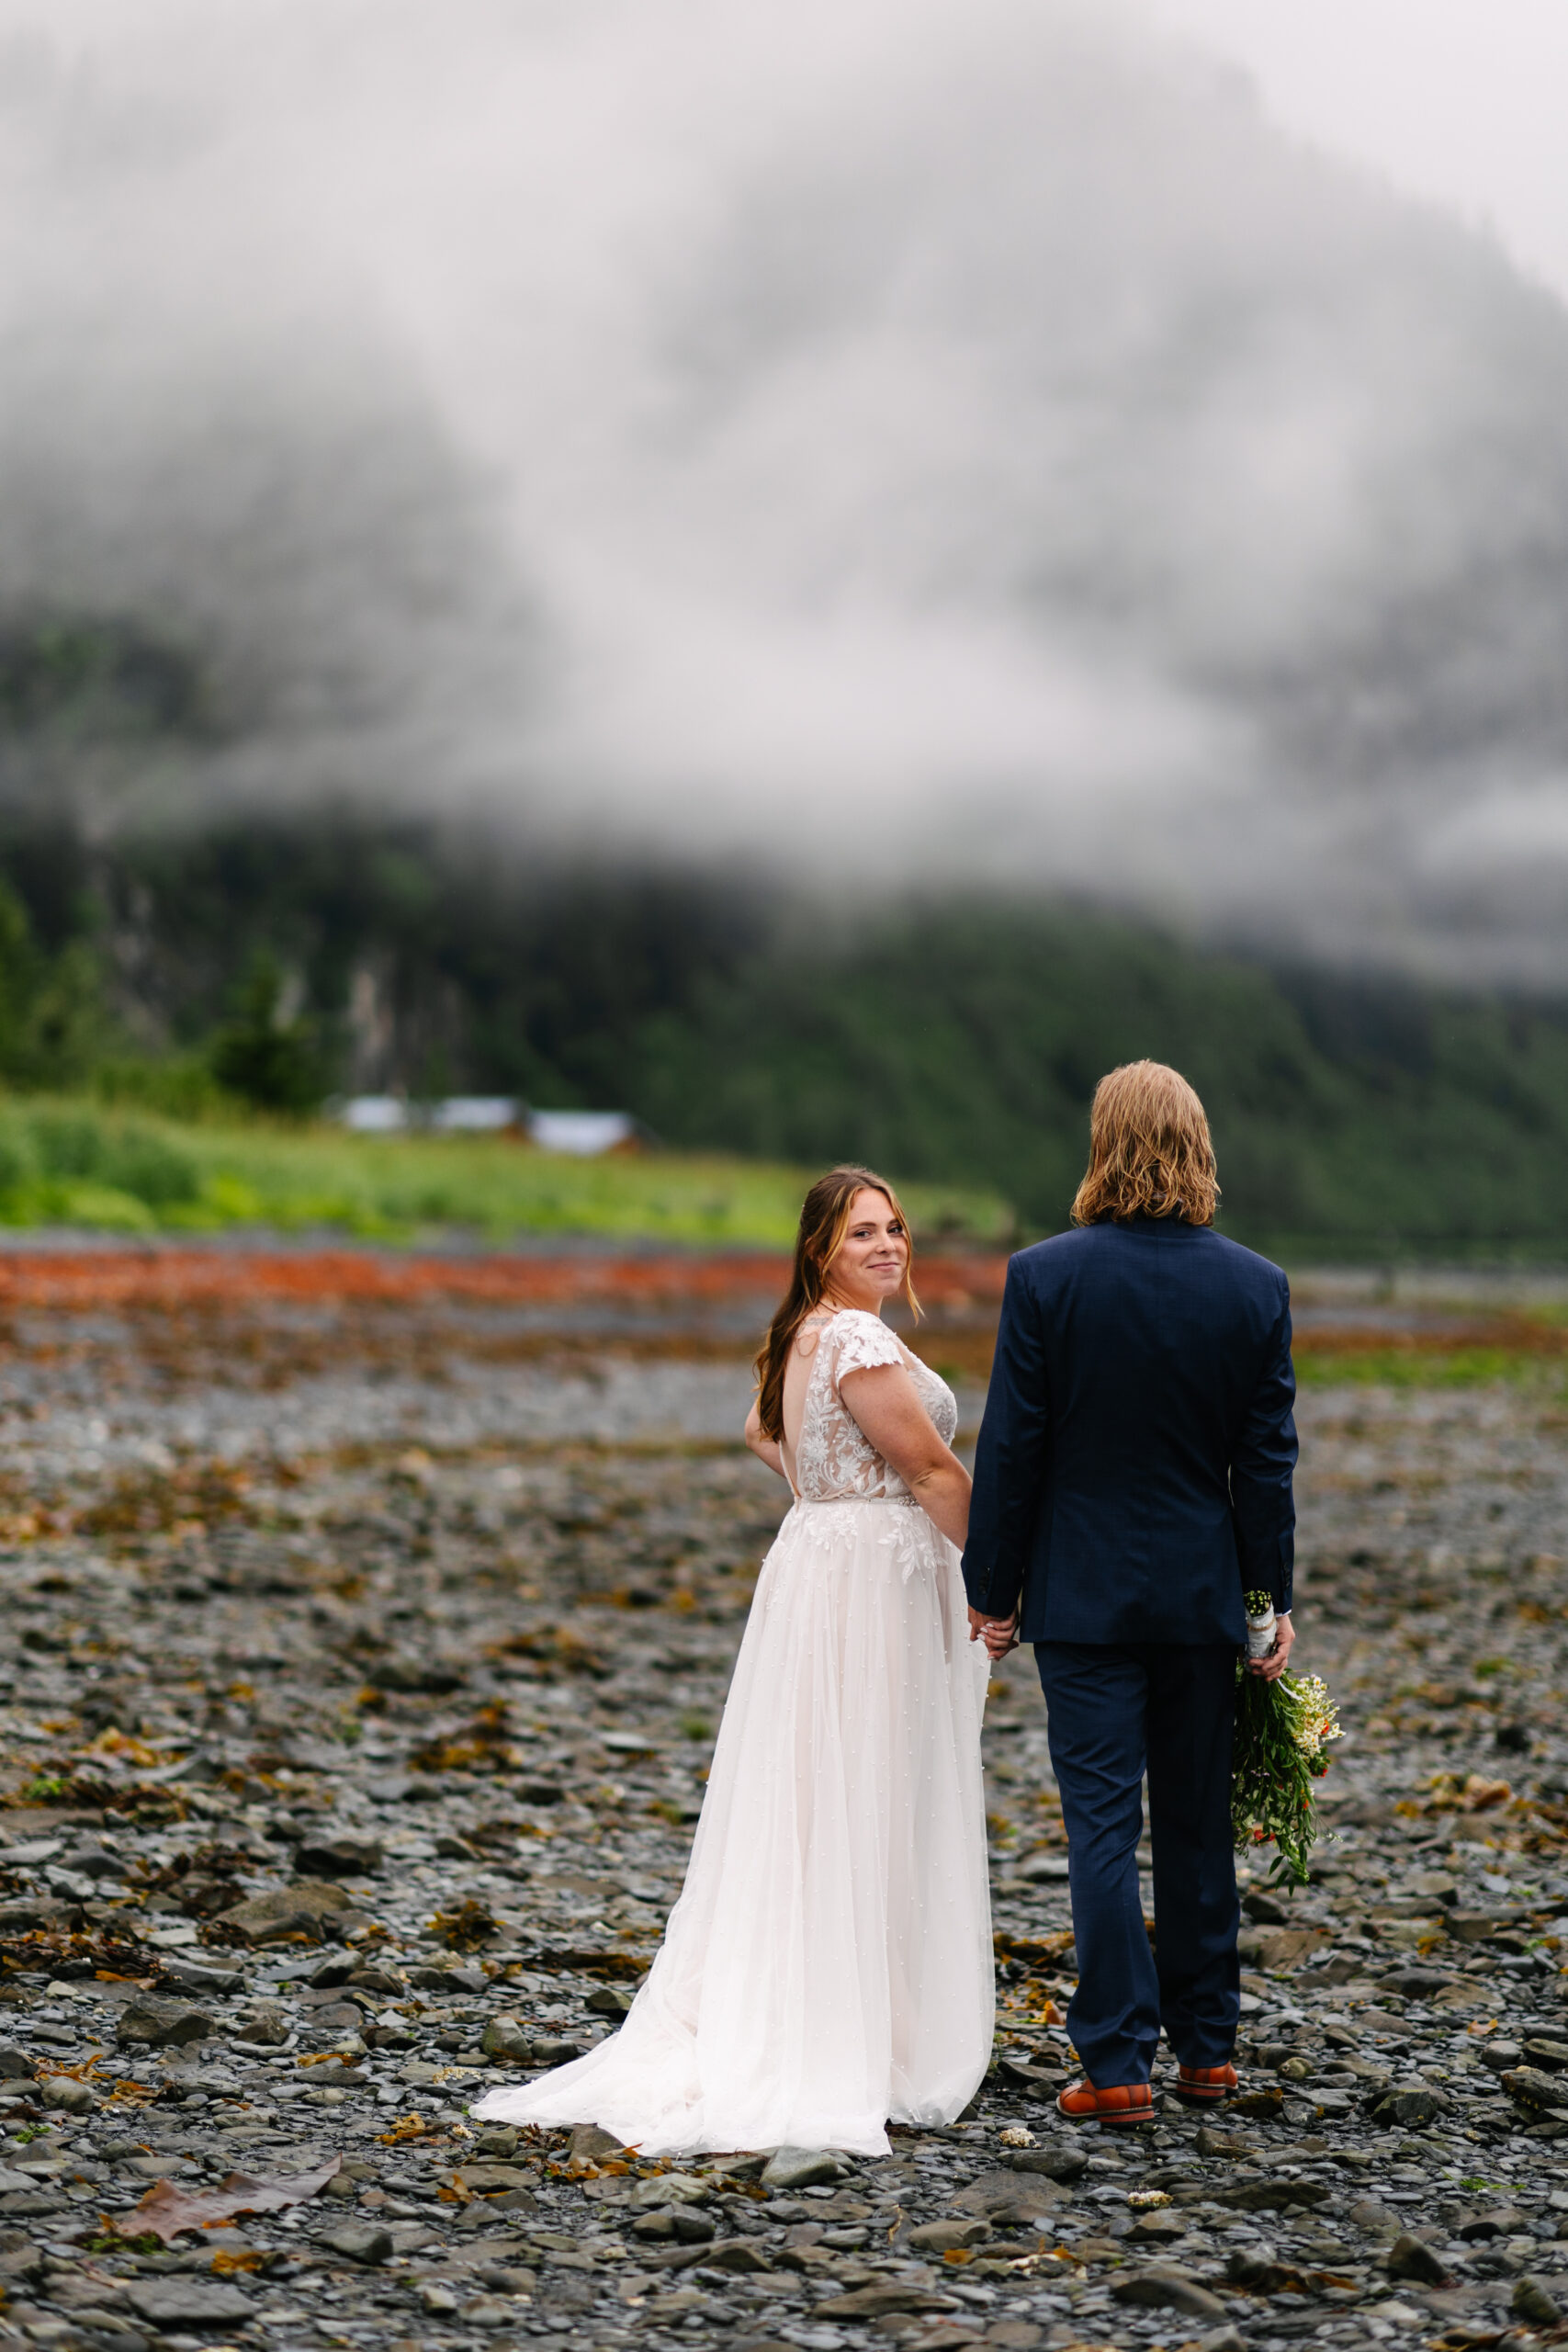
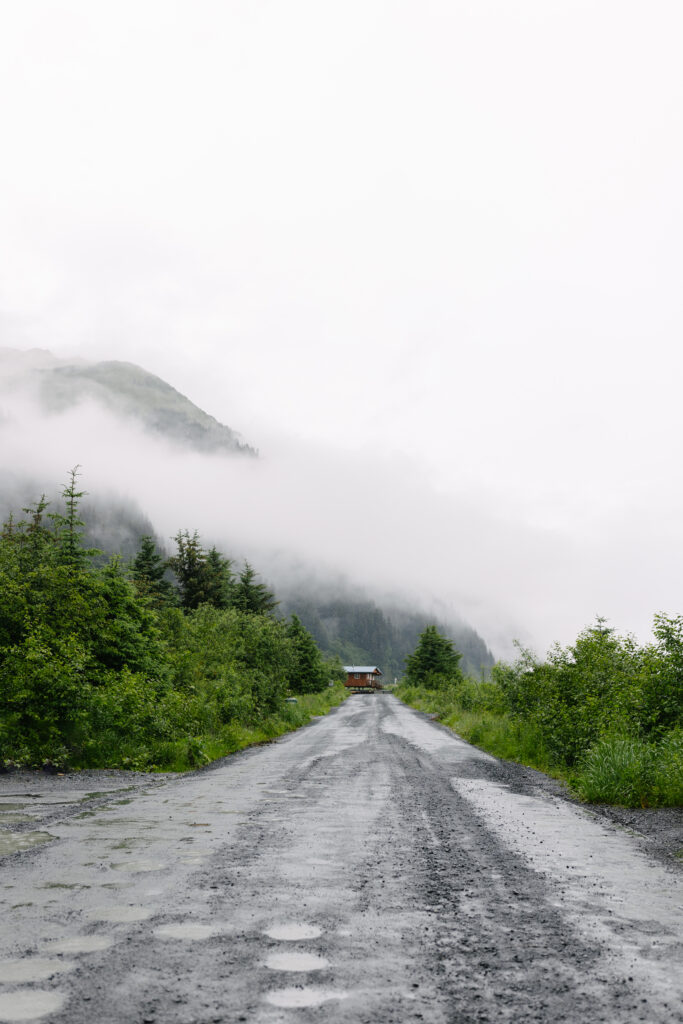
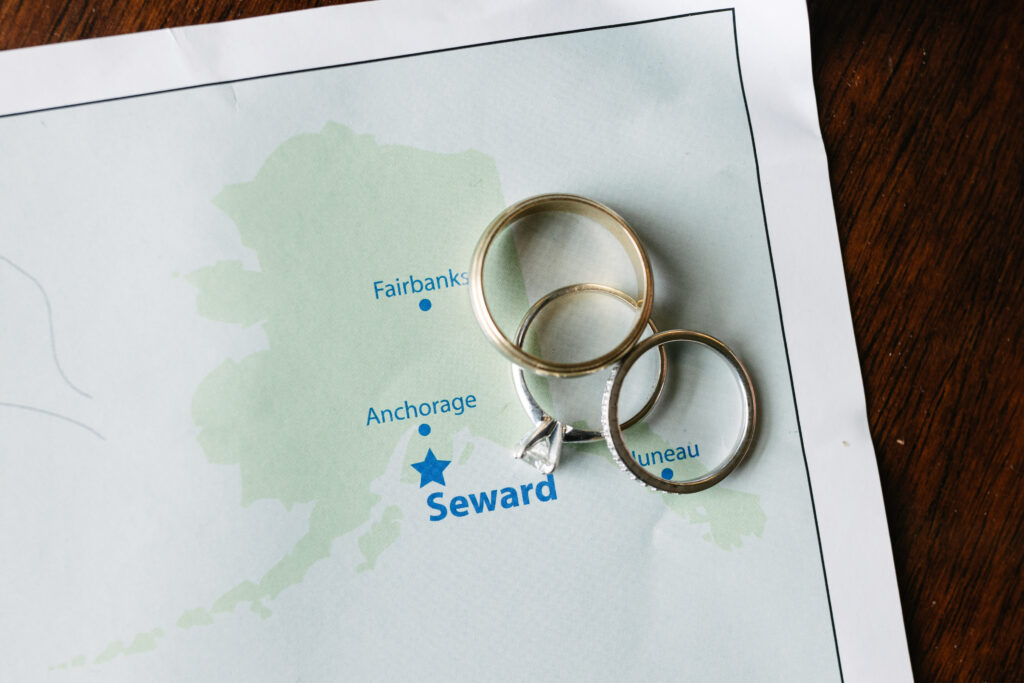
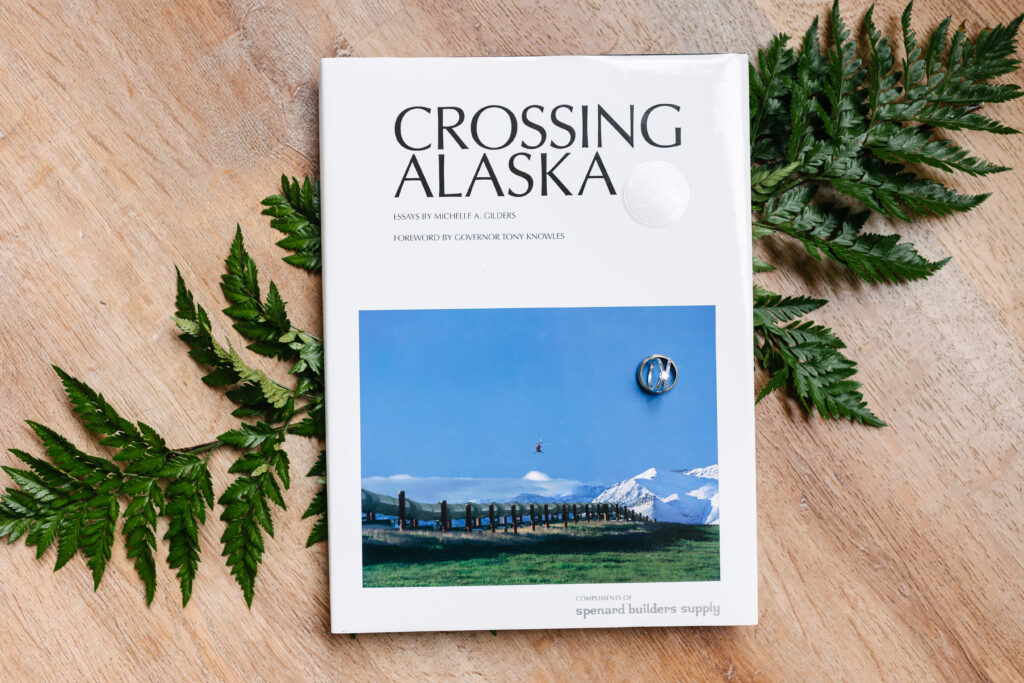
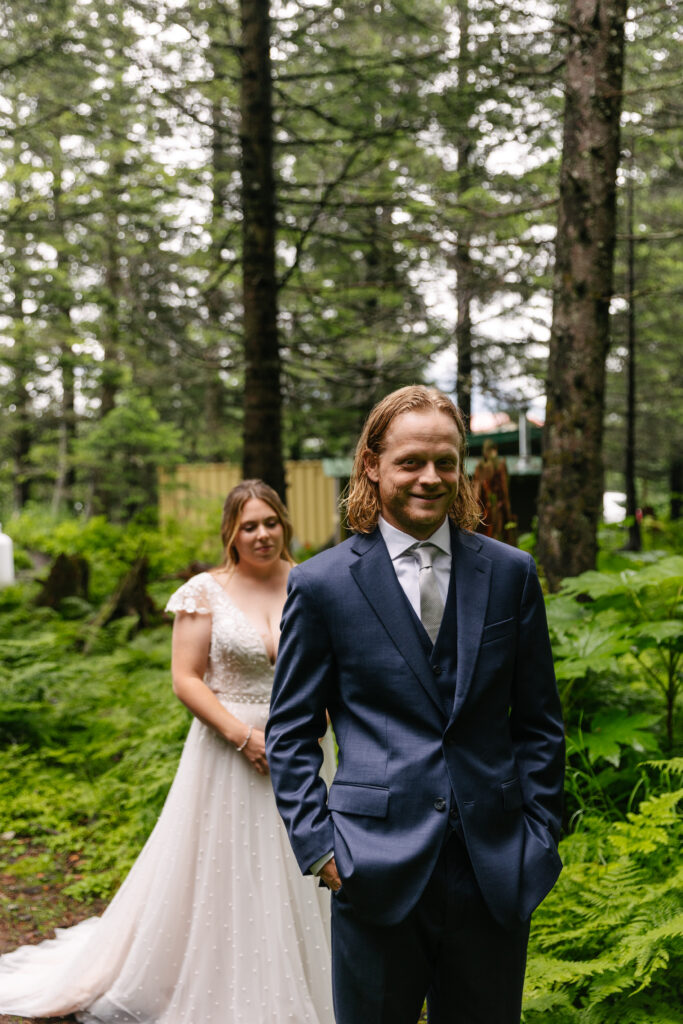
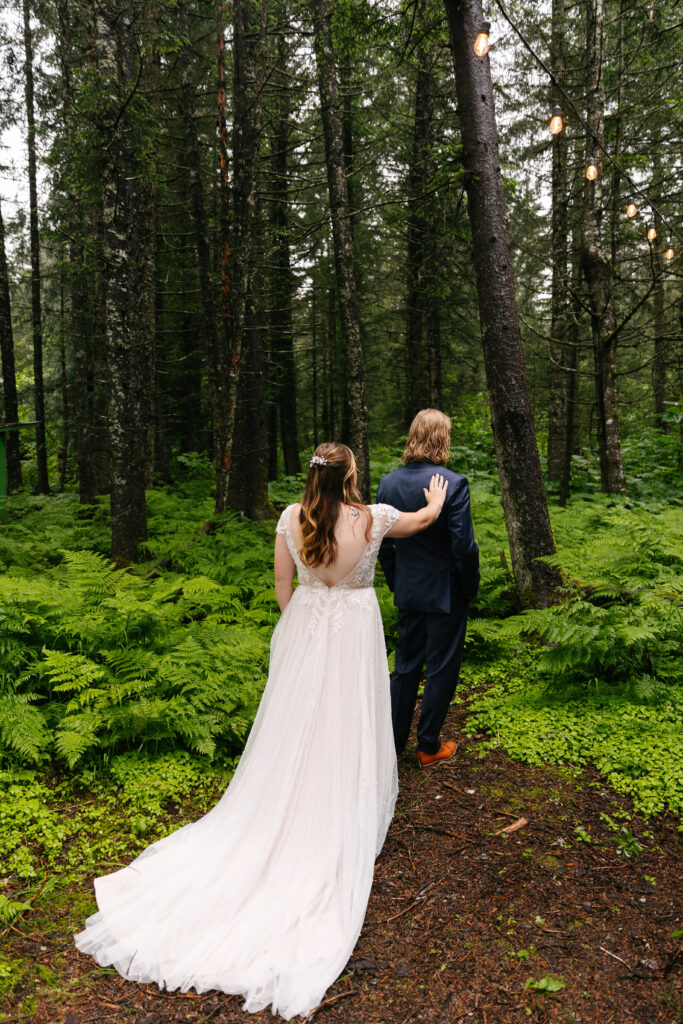
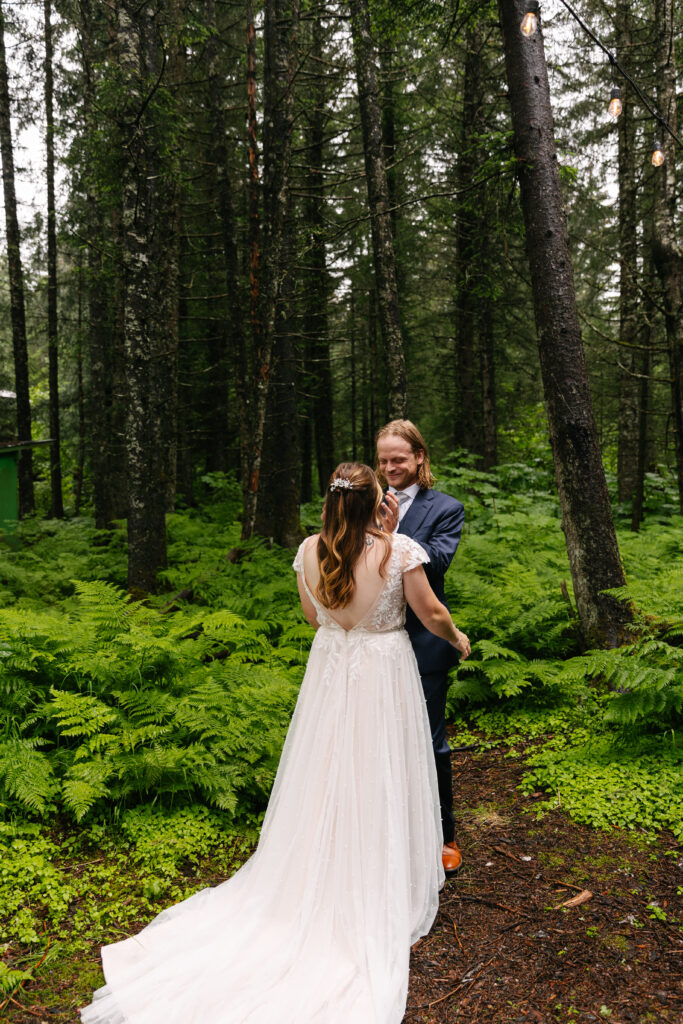
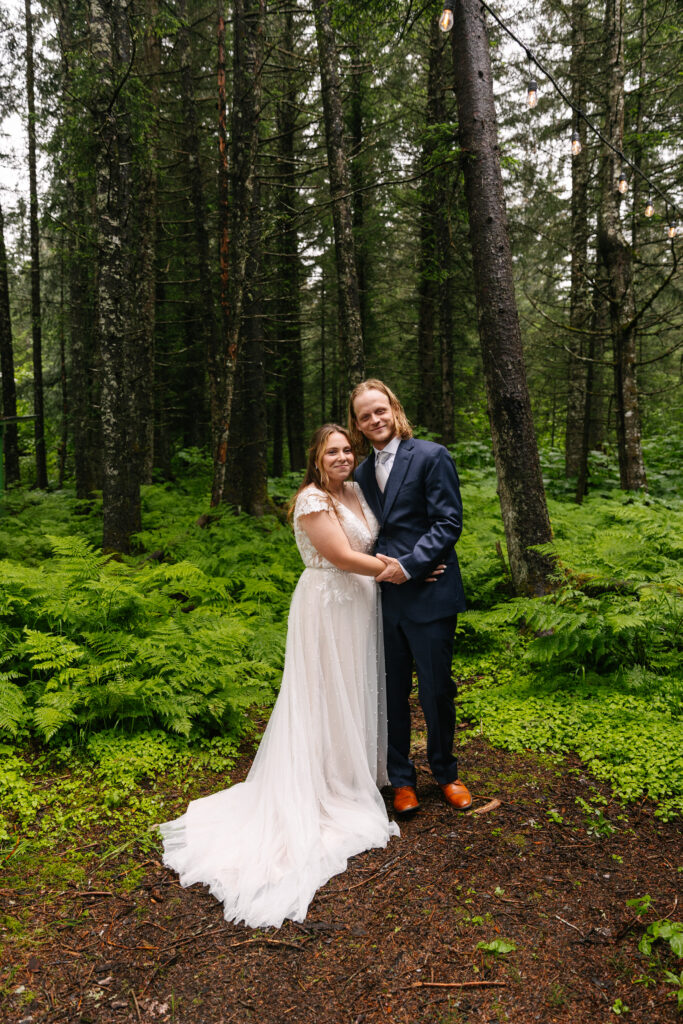
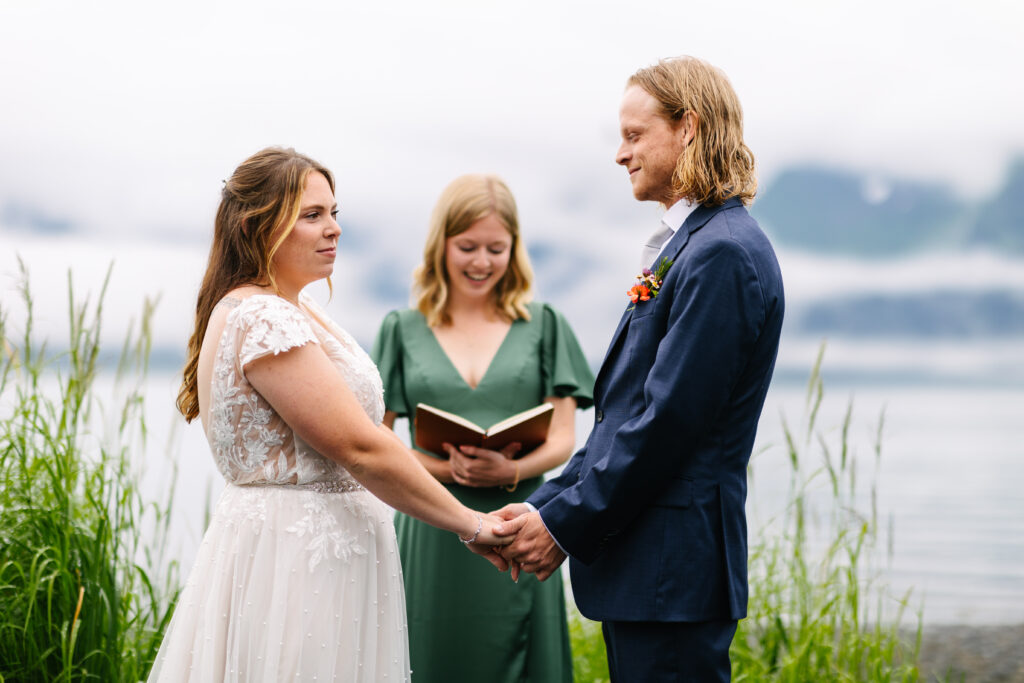
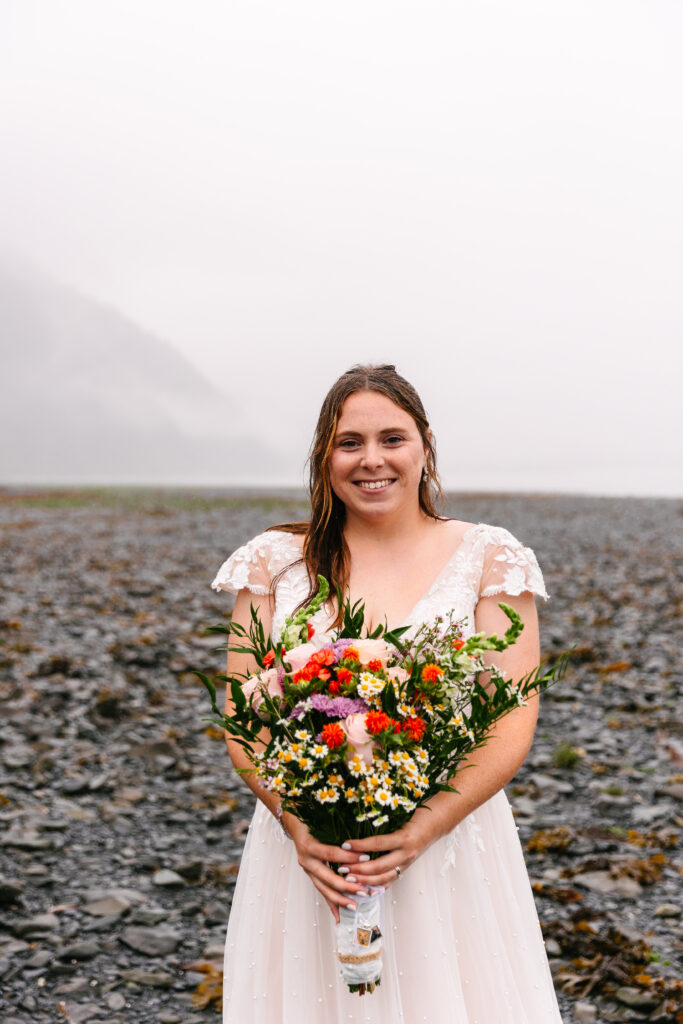
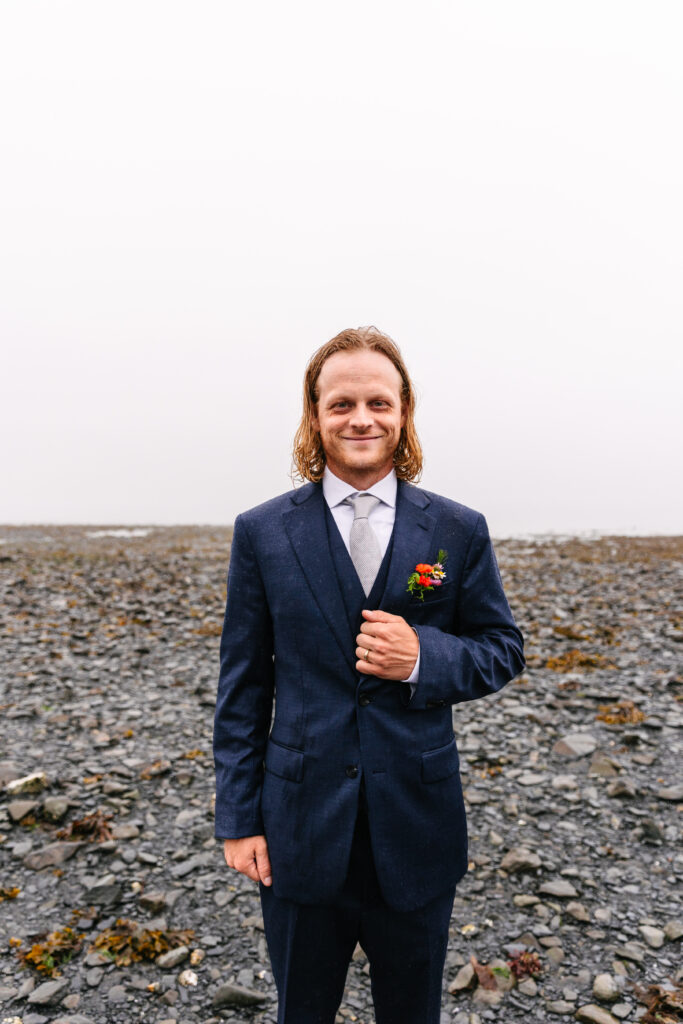
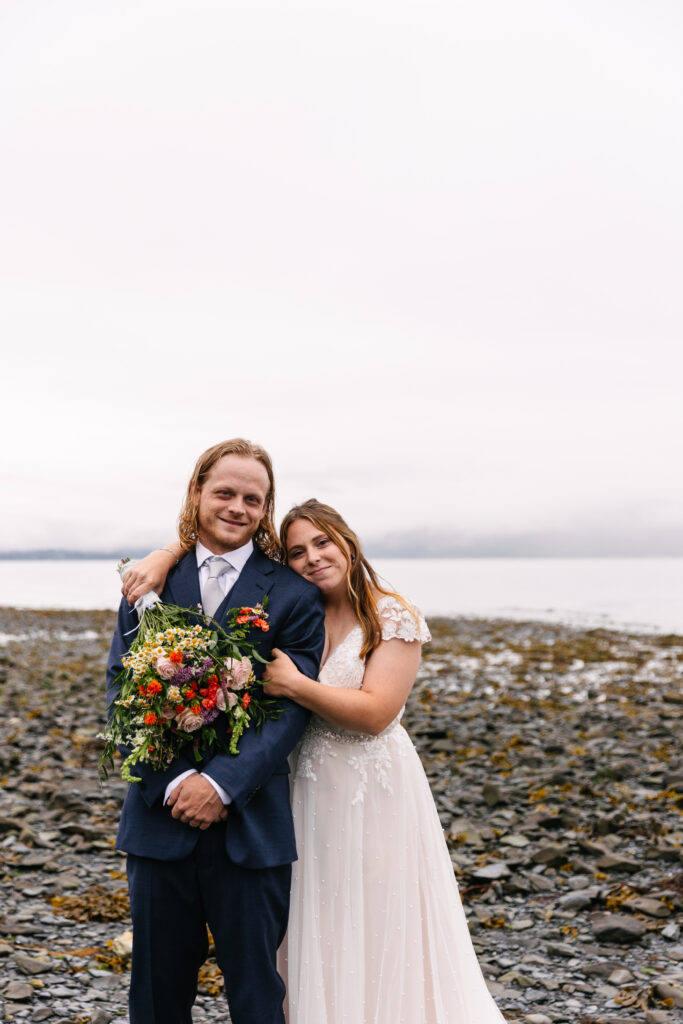
I had the absolute pleasure of capturing Haleigh and Jesse’s elopement in Seward Alaska this past fall. Jesse is the brother of one of my oldest friends, so this opportunity was super special for me! I love small intimate weddings, and being able to travel for work is one of the HUGE perks of my job.
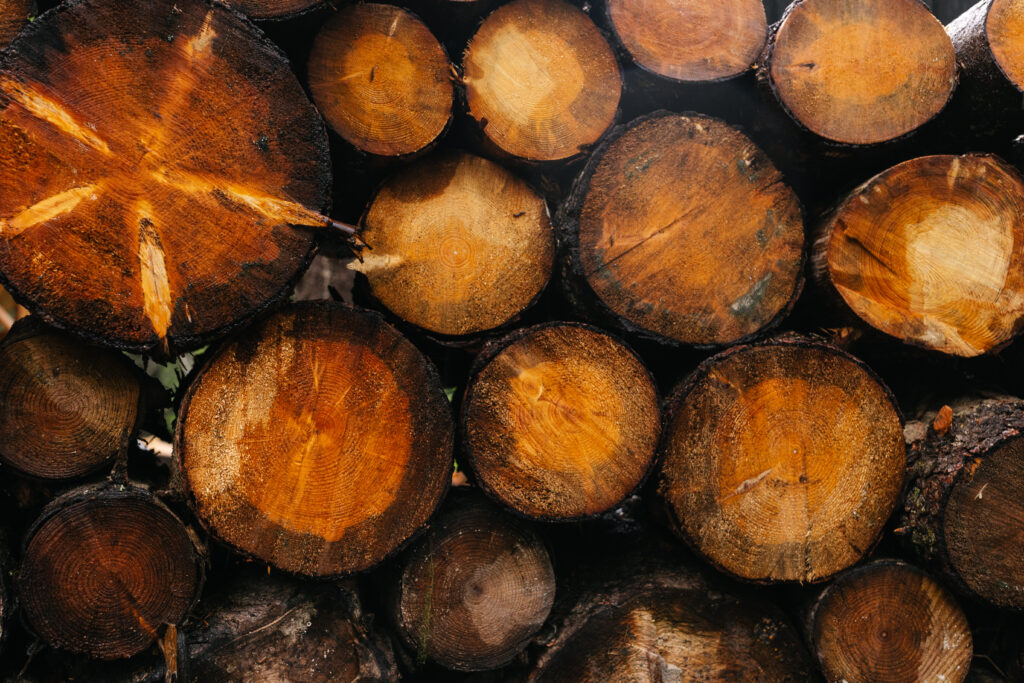
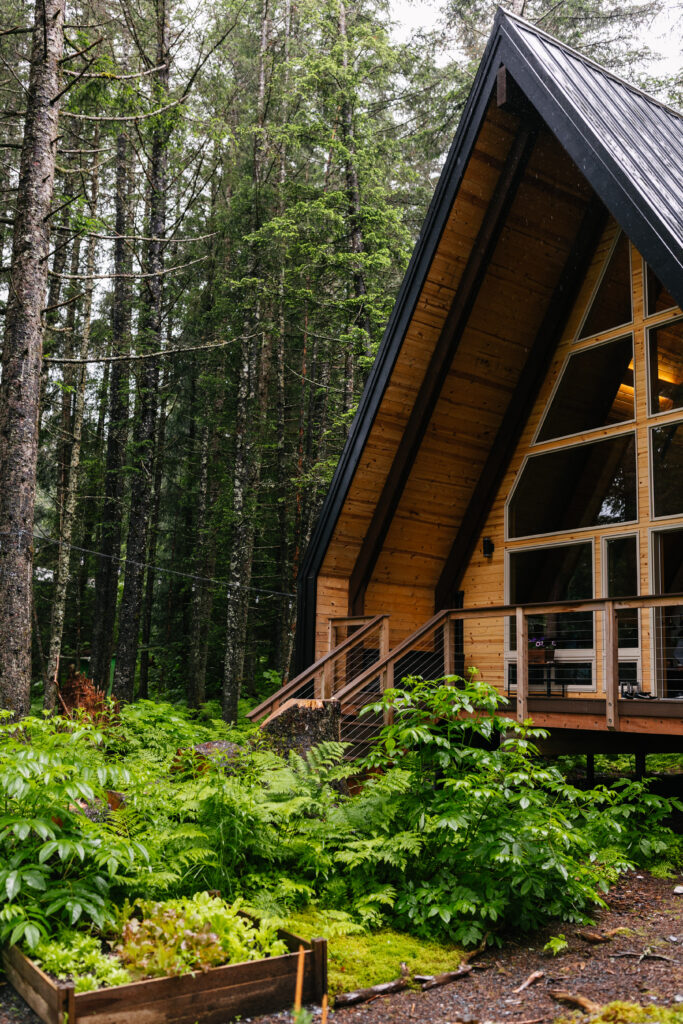
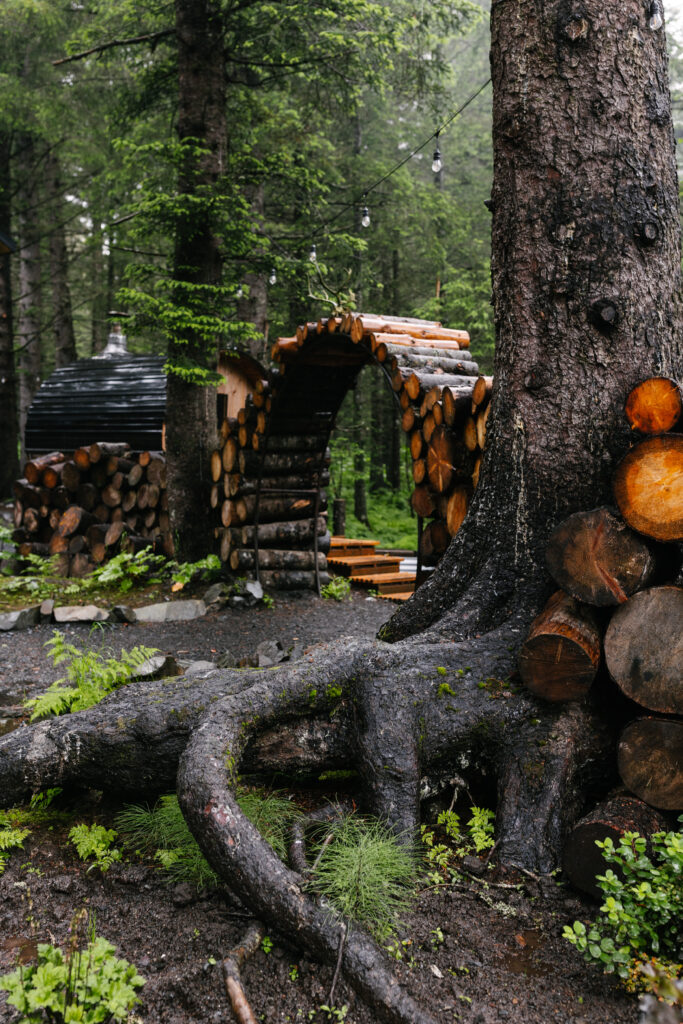
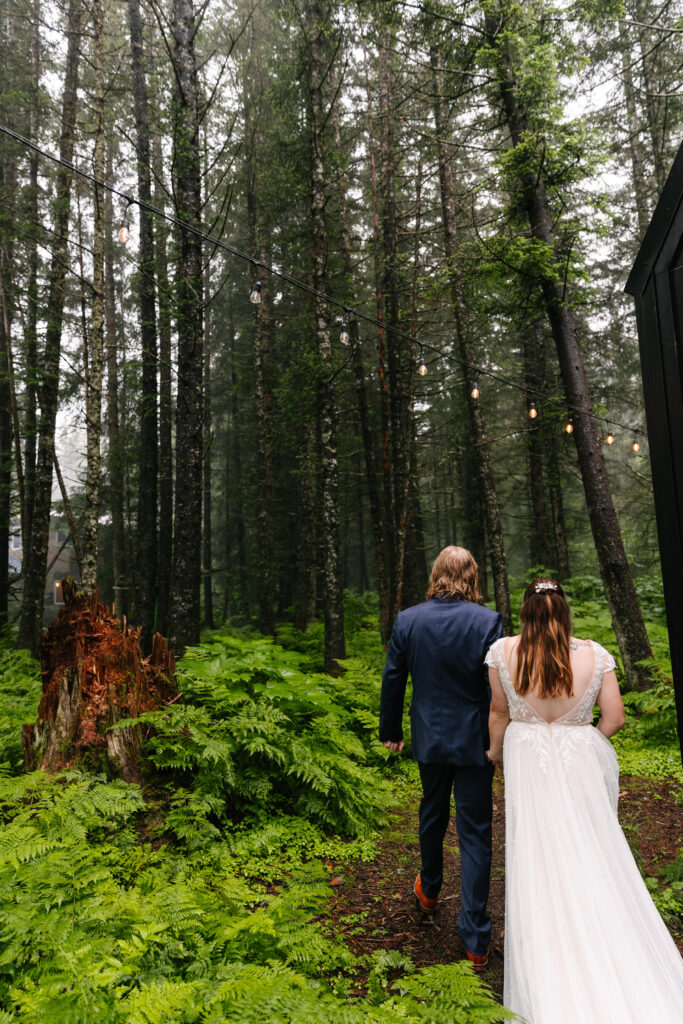
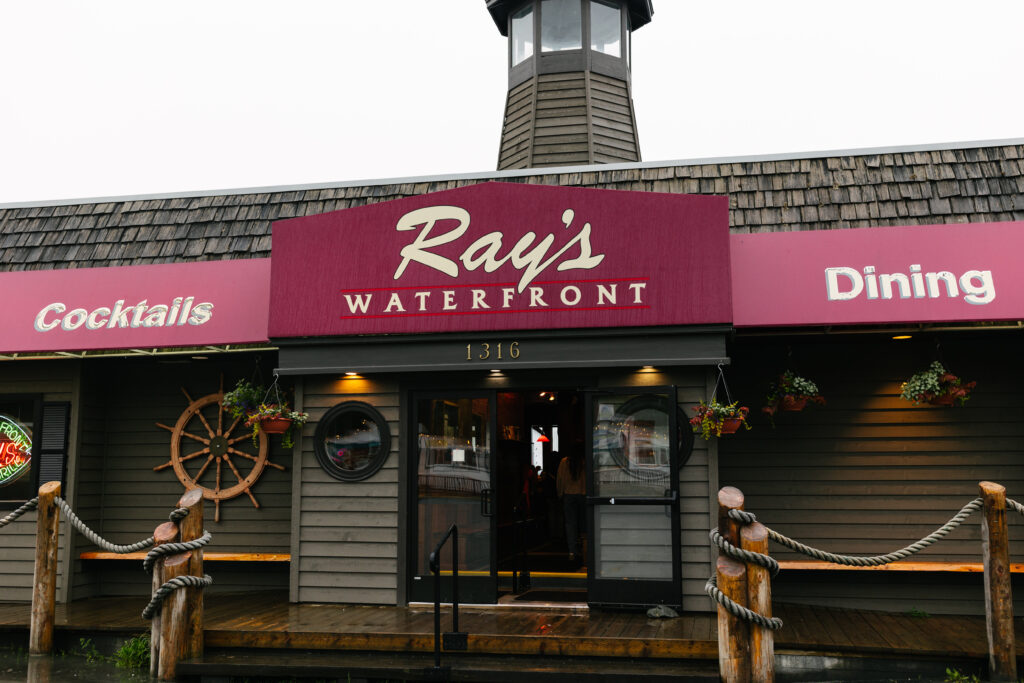
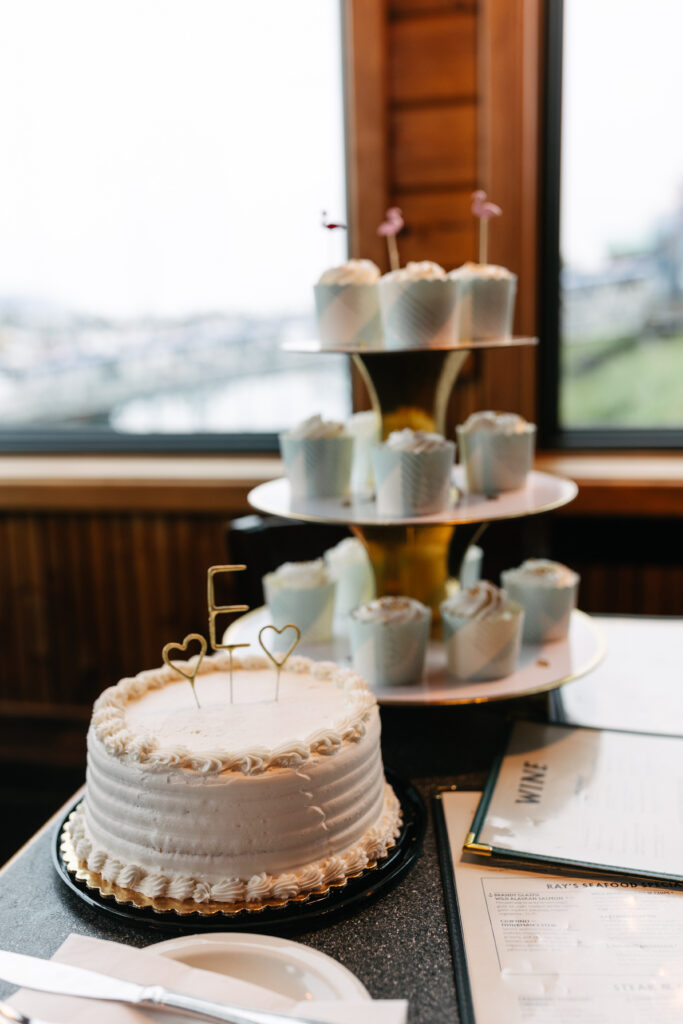
They got married at Salted Roots in Seward Alaska. It is a beautiful venue, with picturesque landscapes and cozy cabins for guests. Haleigh wanted a venue that would make everyone feel right at home and would accommodate their needs. Seward is a small town, but Haleigh found everyone she reached out to about their elopement to be incredibly helpful! Their party of 17 was well taken care of at Salted Roots, and enjoyed a delicious meal at Ray’s Waterfront after the ceremony.
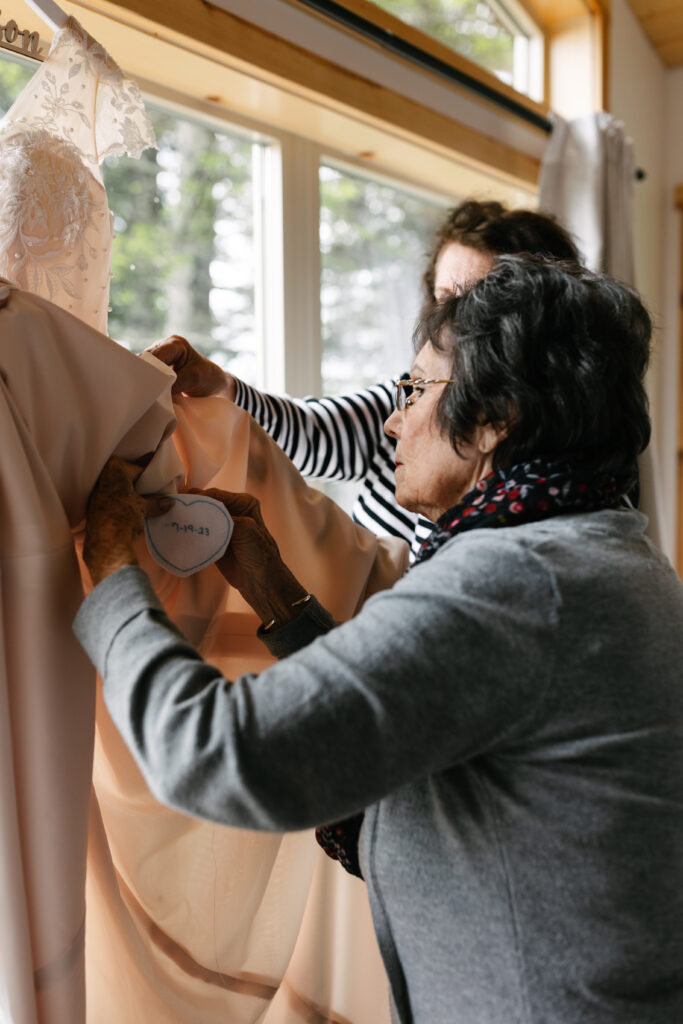
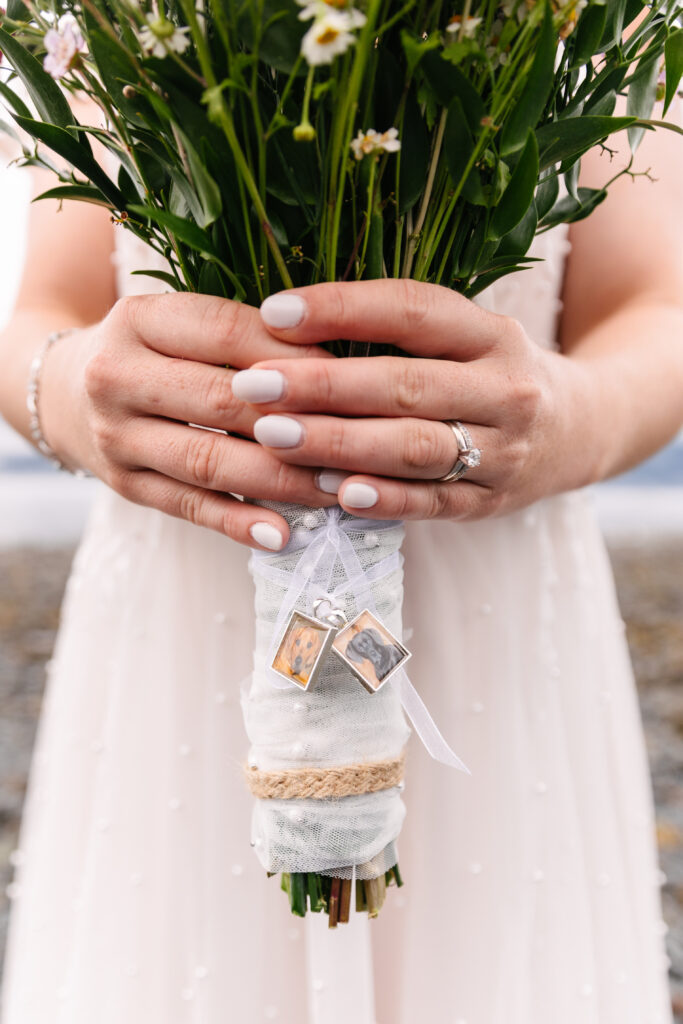
With the wedding being so intimate, it is only fitting that some of the small details were intimate as well. One of Haleigh’s favorite details of the day was a blue heart shaped patch that both of her grandmother’s hand stitched onto her dress. The heart is embroidered with the wedding date.
All in all, the day was perfect. I couldn’t have asked for a better couple to capture in Alaska! Haleigh highly recommends eloping! She said, “You can always have a reception when you get home!”


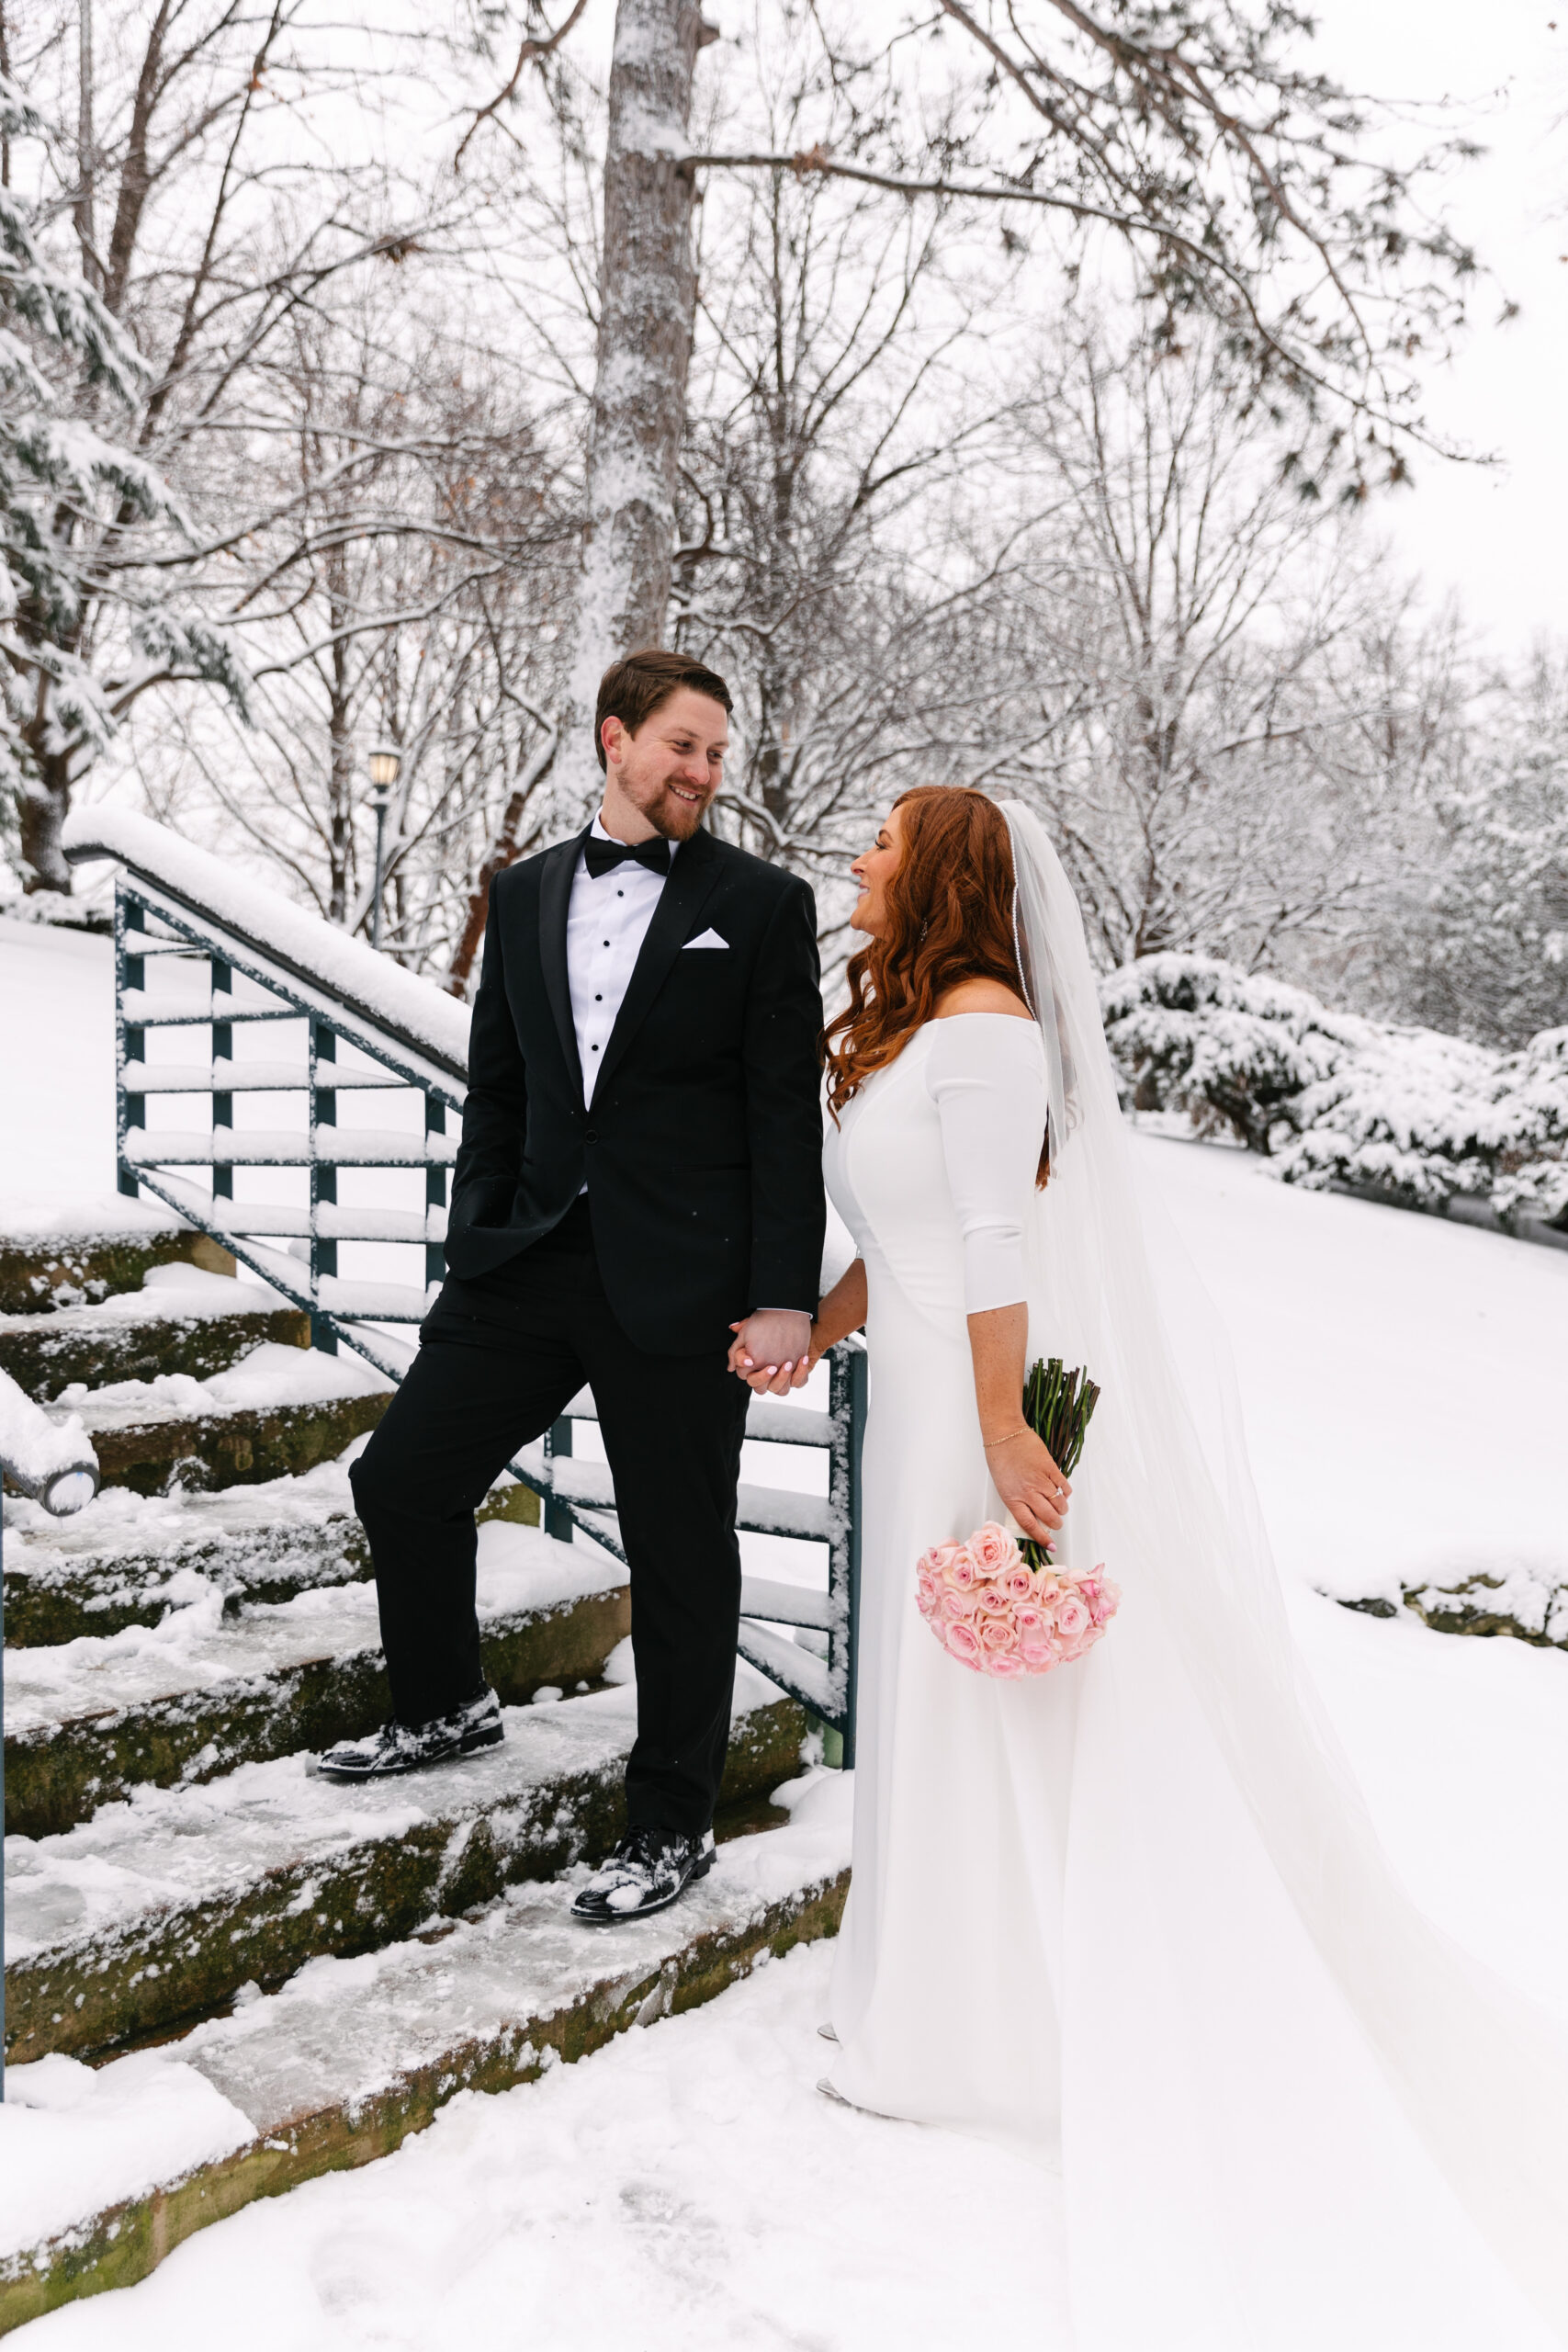
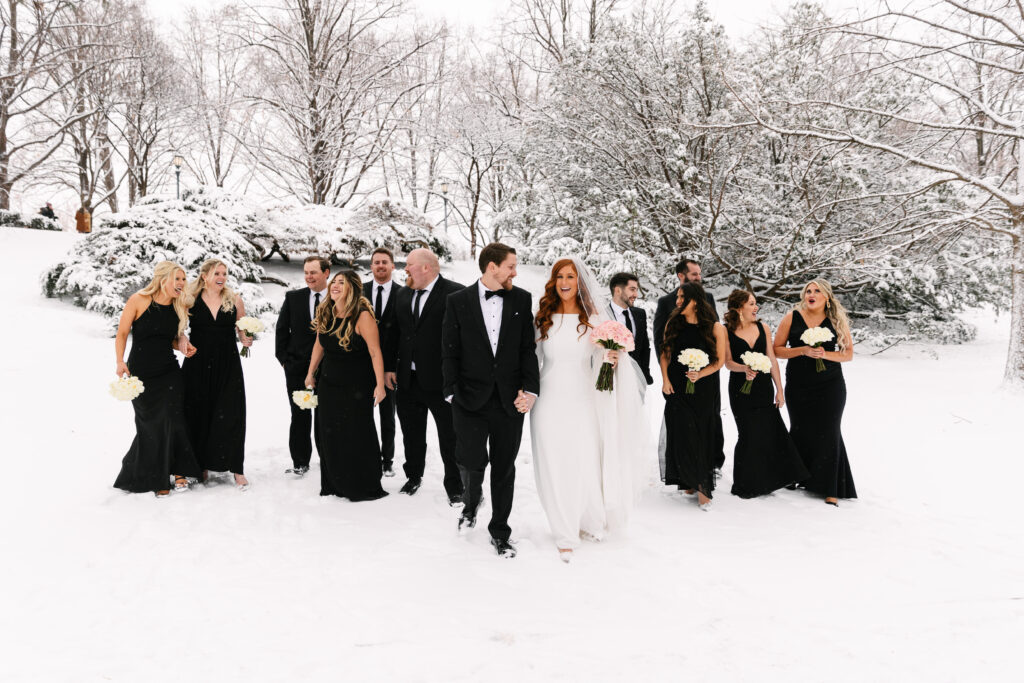
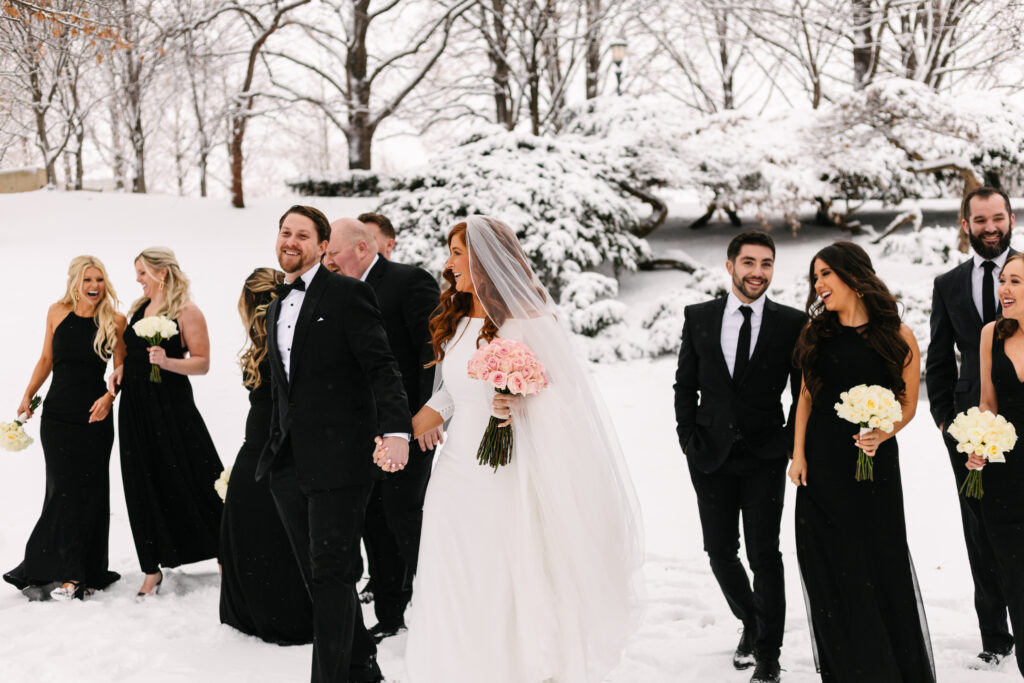
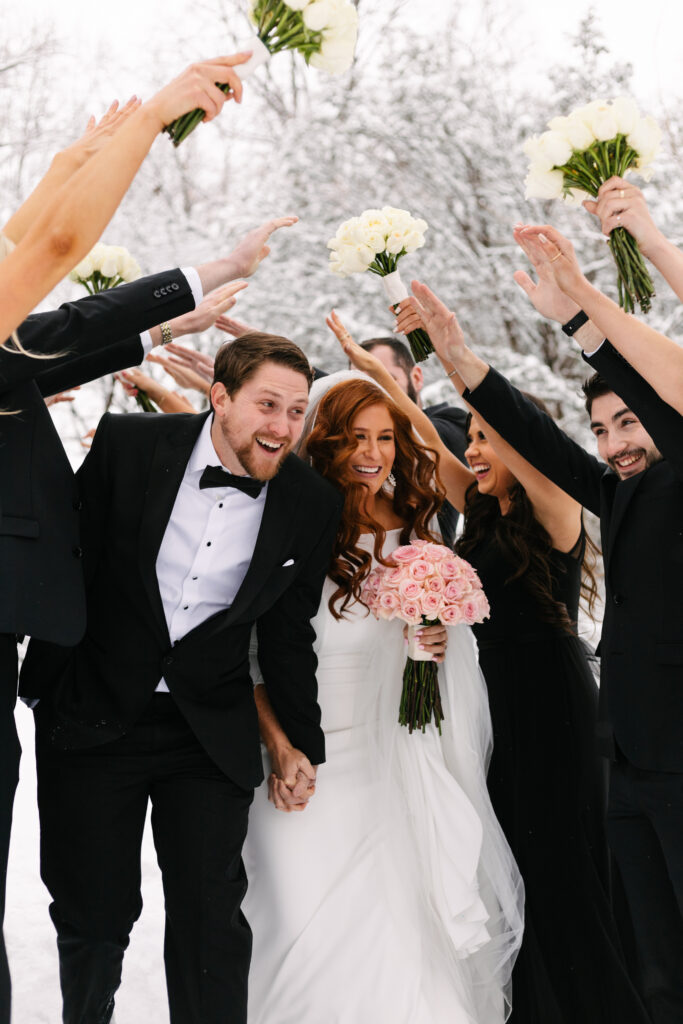
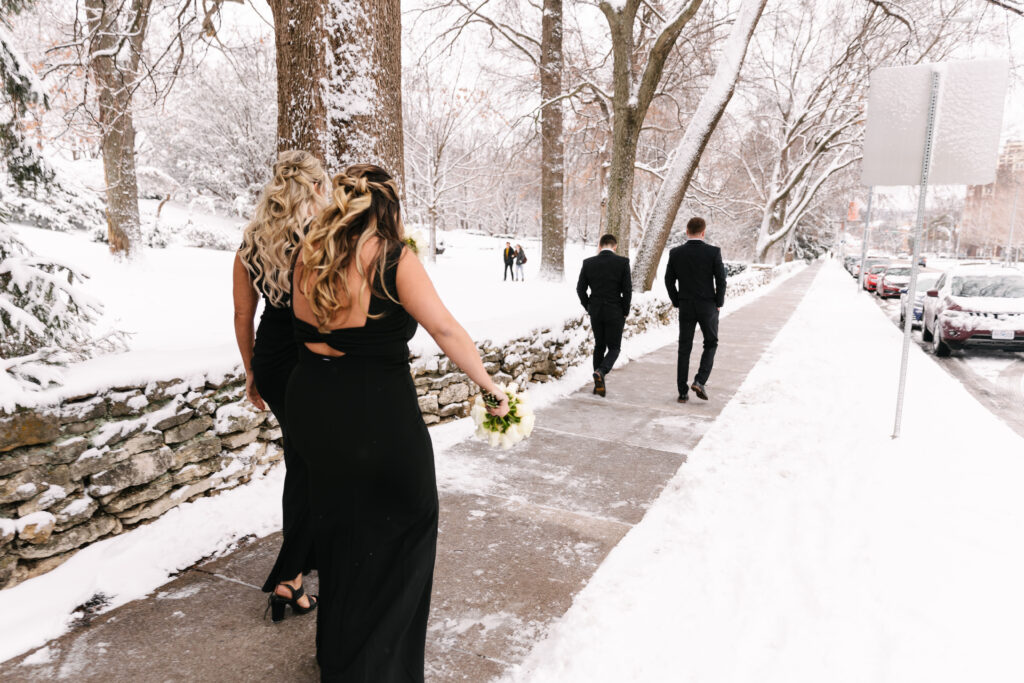
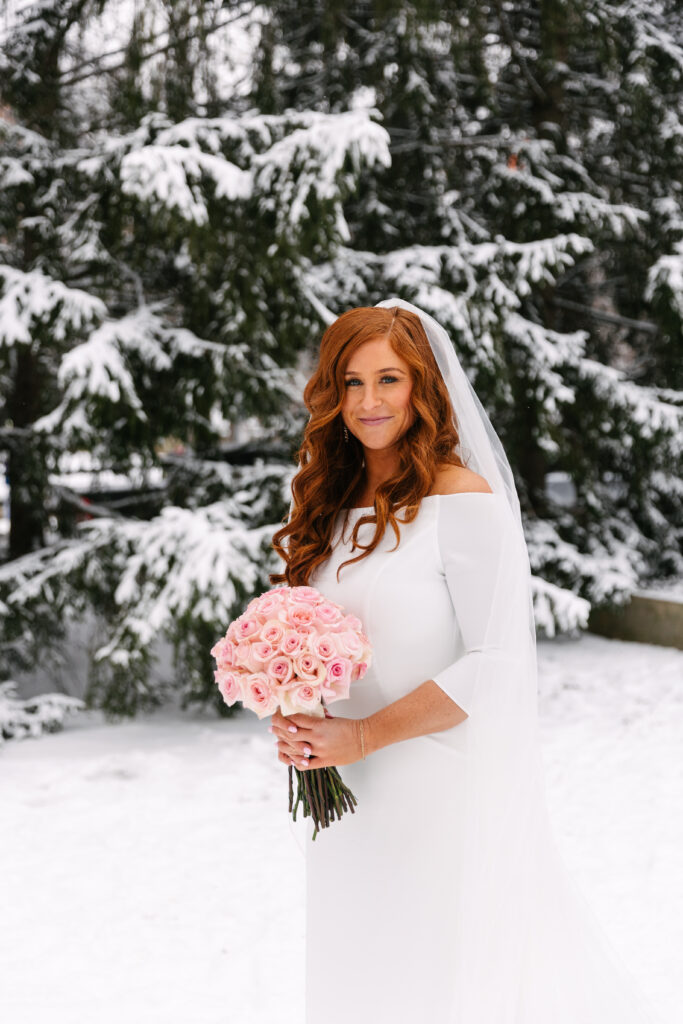
Snow on your wedding day can transform the landscape into a magical wonderland, adding a touch of whimsy and charm to your celebration. However, it also brings its own set of challenges. Here are some tips to navigate and make the most of a snowy wedding day:
- Check the Weather Forecast: Stay updated on the weather forecast as your big day approaches. This helps in planning and making necessary arrangements beforehand.
- Dress Accordingly: Embrace the beauty of the snow by dressing appropriately. Consider a shawl, faux fur wrap, or a stylish coat that complements your wedding attire while keeping you warm.
- Footwear Matters: Opt for footwear suitable for snow, such as boots or shoes with good traction. You can even get creative by incorporating stylish boots that blend seamlessly with your outfit.
- Transportation Plans: Arrange for reliable transportation that can navigate through snowy roads. Consider hiring a professional driver or a vehicle equipped to handle winter conditions.
- Winter Accessories: Encourage your guests to dress warmly by suggesting winter accessories like scarves, gloves, or hand warmers. You can even provide blankets or shawls for outdoor ceremonies.
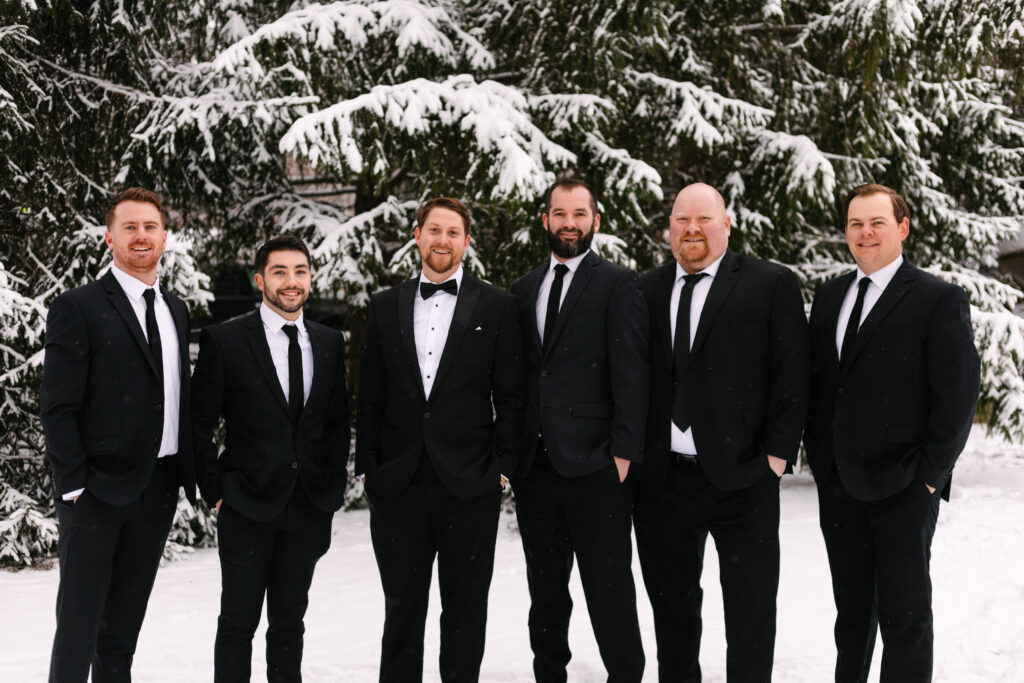
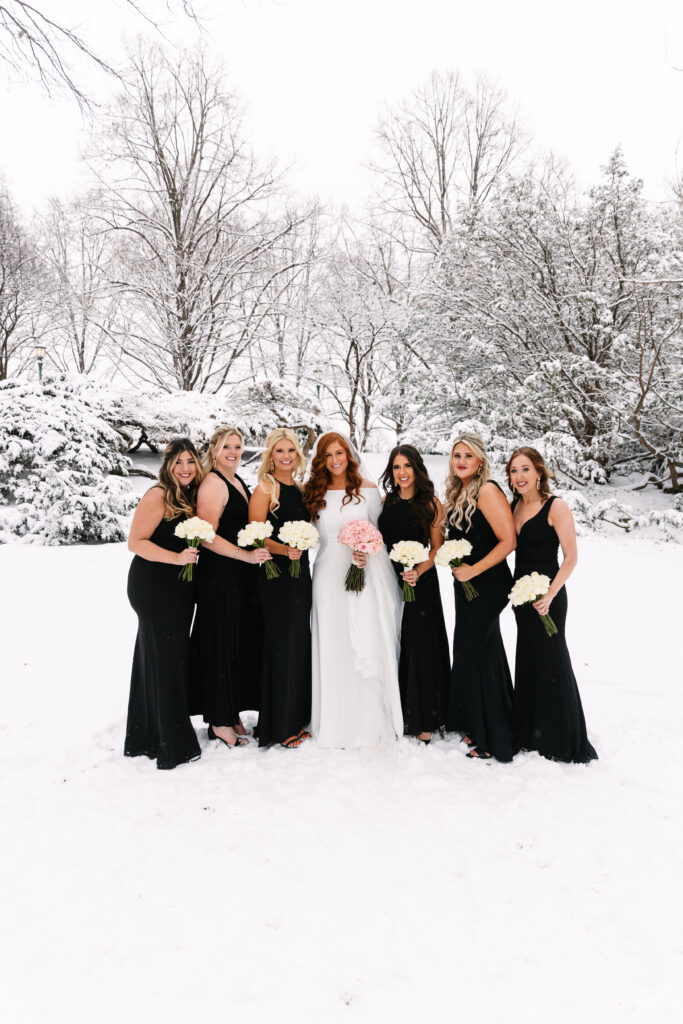
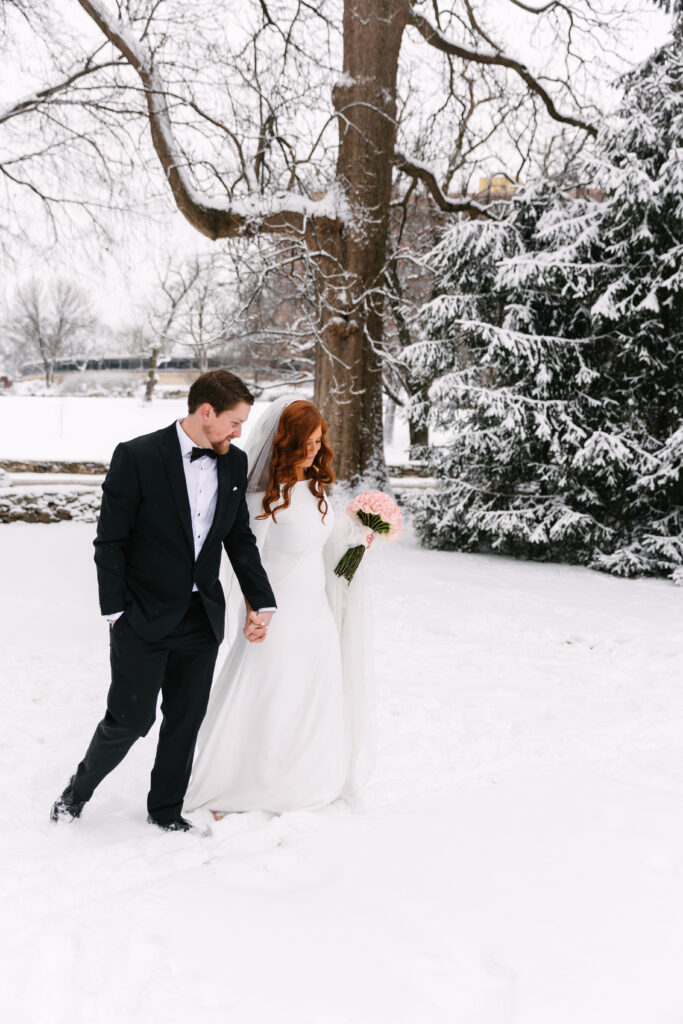
- Photography Opportunities: Embrace the snowy backdrop for stunning wedding photos. Work with your photographer to capture the enchanting beauty of the winter landscape.
- Venue Preparedness: Ensure your wedding venue is well-prepared for the snow. Confirm that walkways are shoveled, salted, and safe for guests to navigate.
- Backup Plans: Have a backup plan in case of extreme weather conditions. Whether it’s moving the ceremony indoors or adjusting the schedule, flexibility is key to ensuring a smooth day.
- Stay Warm and Hydrated: Keep yourselves and your guests warm by offering hot beverages or setting up stations with warm drinks. It’s essential to stay hydrated even in colder temperatures.
- Enjoy the Moment: Despite the weather, focus on the joy and love surrounding your special day. Snow can add a unique touch to your wedding, creating unforgettable memories.
A snowy wedding day can be breathtakingly beautiful with the right preparations and mindset. Embrace the magic of the winter wonderland while ensuring everyone’s comfort and safety, creating a day filled with warmth, love, and enchantment.


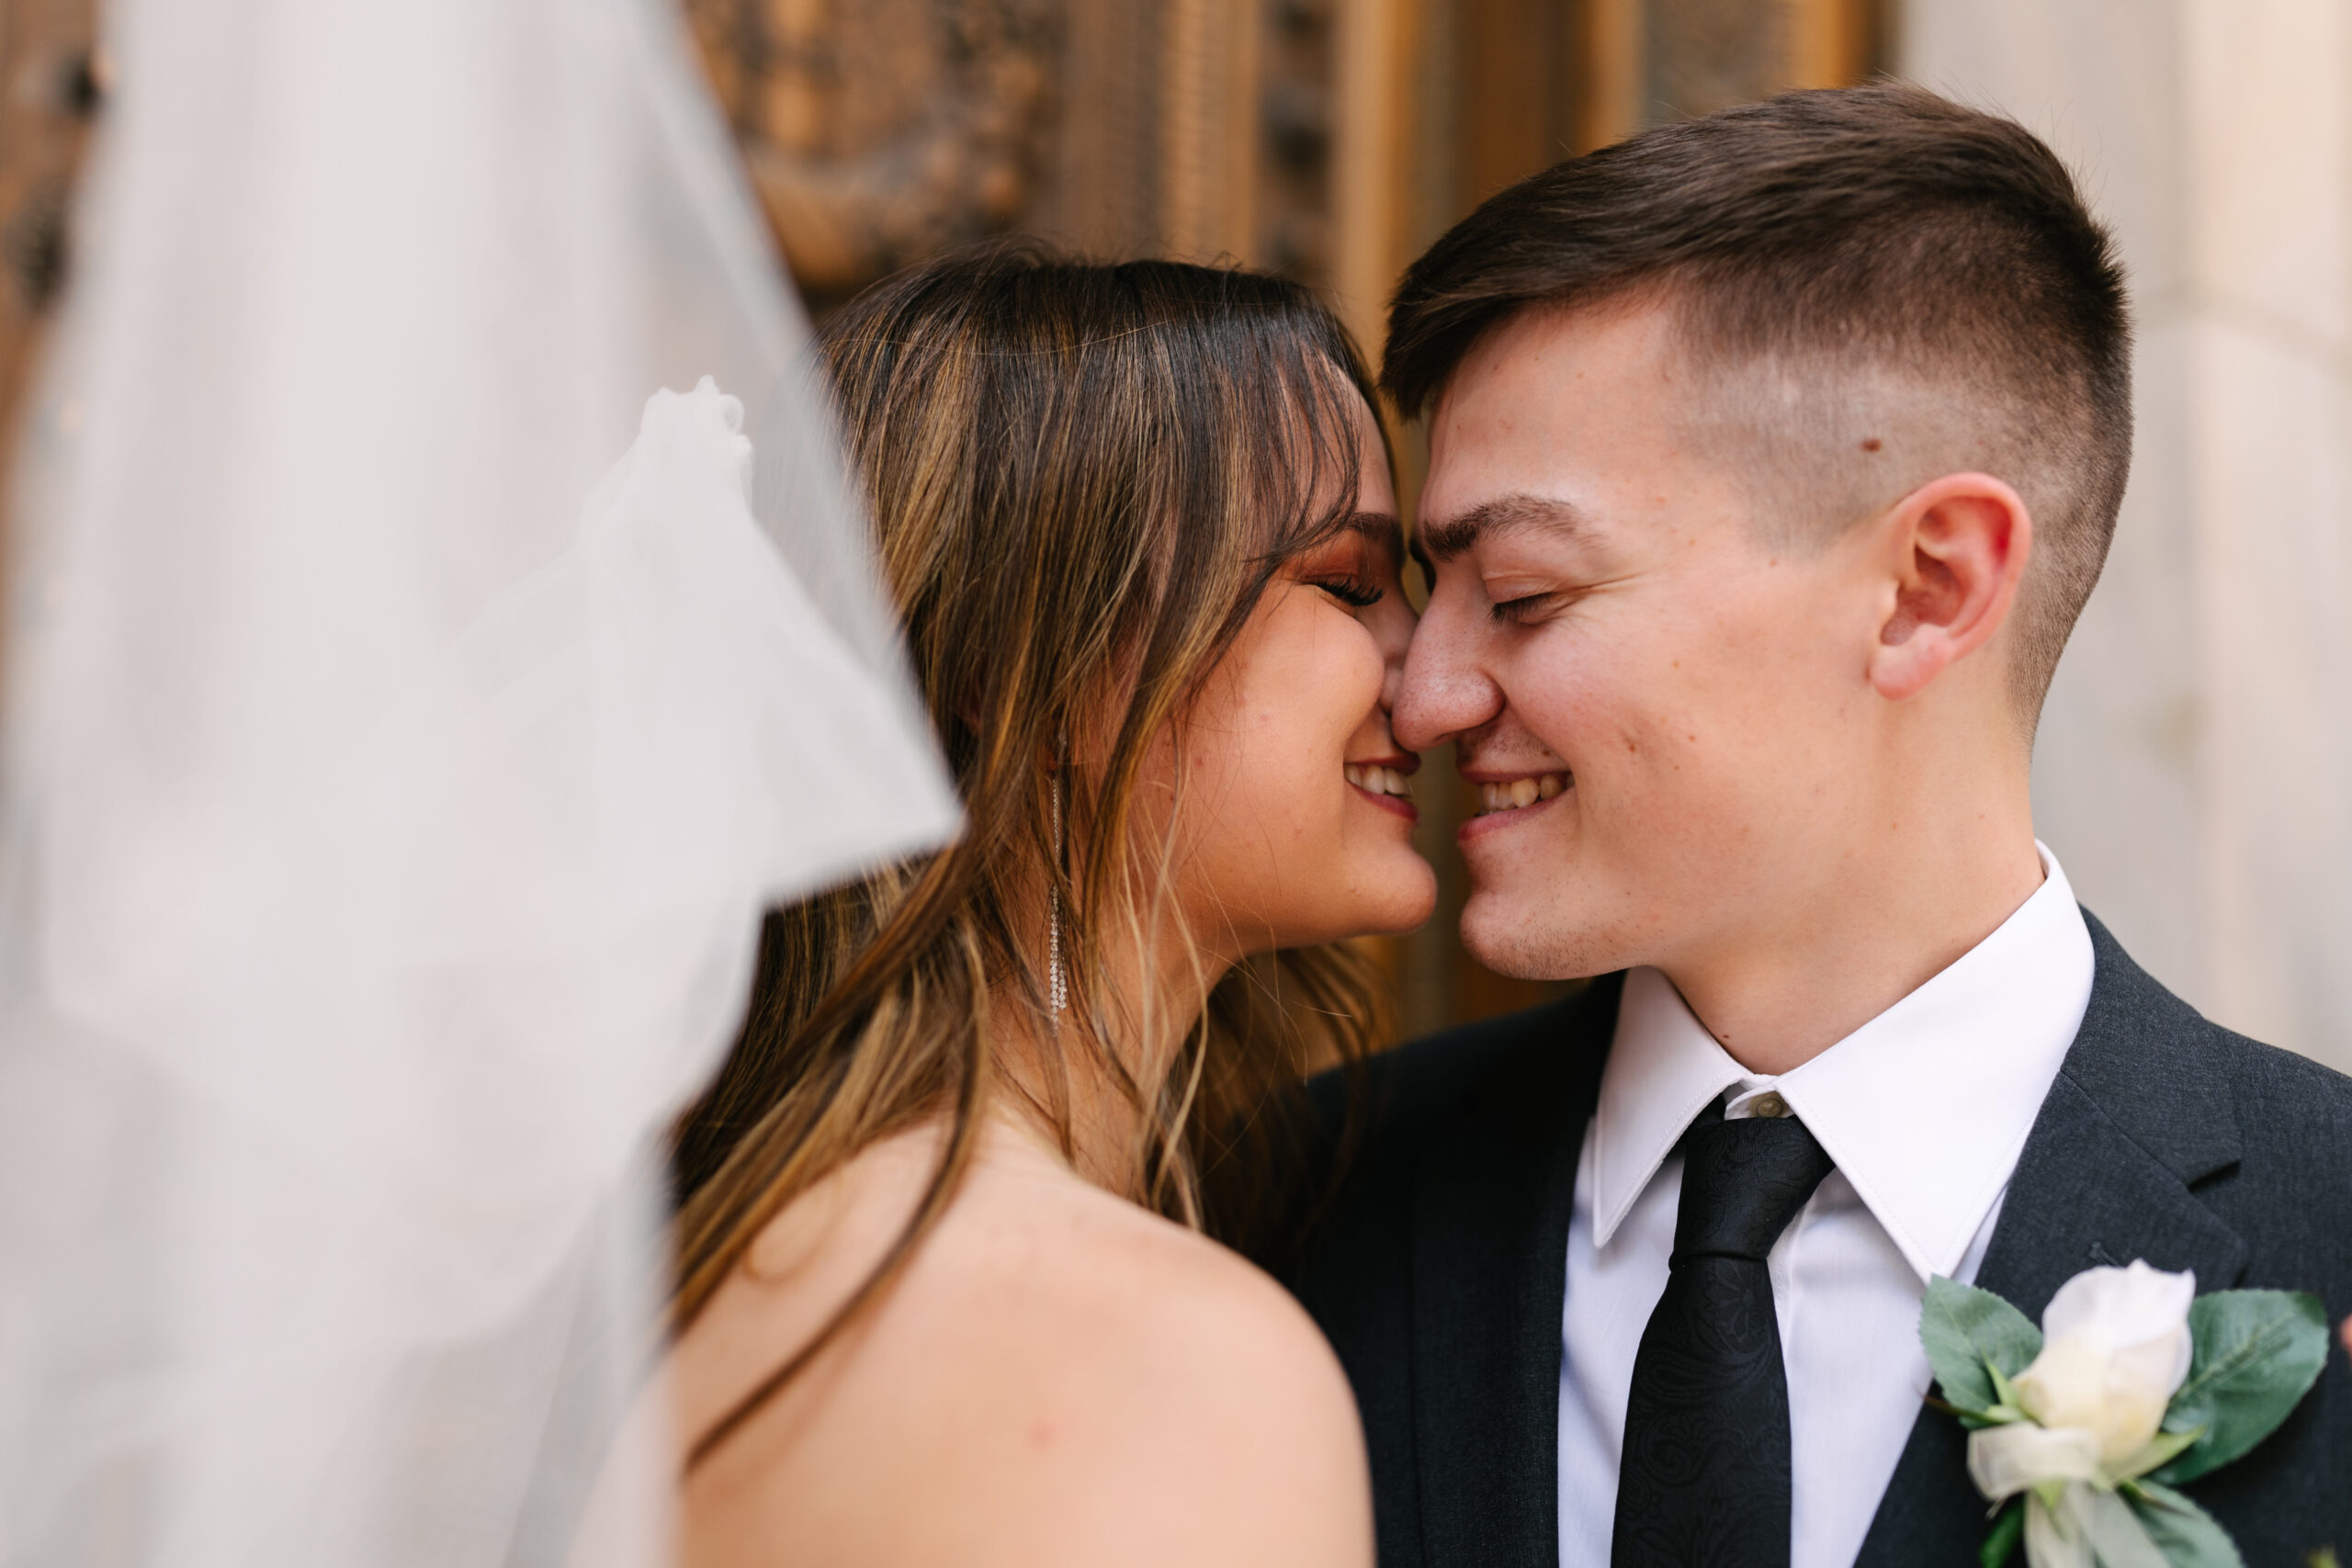
In the heart of Kansas City, Courtney and Jensen Knight chose a simple yet beautiful location for their elopement at the Johnson County Courthouse. A handful of cherished family and friends joined together for their intimate ceremony on a bright and sunny day!
Courtney wore a stunning off-the-shoulder gown, in a classic white. Her dress was complemented by a bouquet of beautiful white hydrangeas. Jensen wore a traditional black suit with a white boutonniere to match Courtney’s bouquet.
The couple didn’t have a bridal party. Which is common with elopements and also continues to grow in popularity for weddings of all sizes. With no wedding party, both of their mother’s signed the marriage certificate as witnesses.
It wasn’t about lavishness, but the sincerity of their love. It a brightly lit corner of the glass-walled courthouse, they shared their vows, surrounded by their closest family and friends.
After the ceremony we headed outside to capture some moments of the new bride and groom, as well as family and group photos. The Johnson County Courthouse is as incredibly beautiful building and photographs wonderfully.
I feel blessed to have been asked to capture this special day for Courtney and Jensen and I especially wish them so much love and happiness as they continue on their journey together as husband and wife!


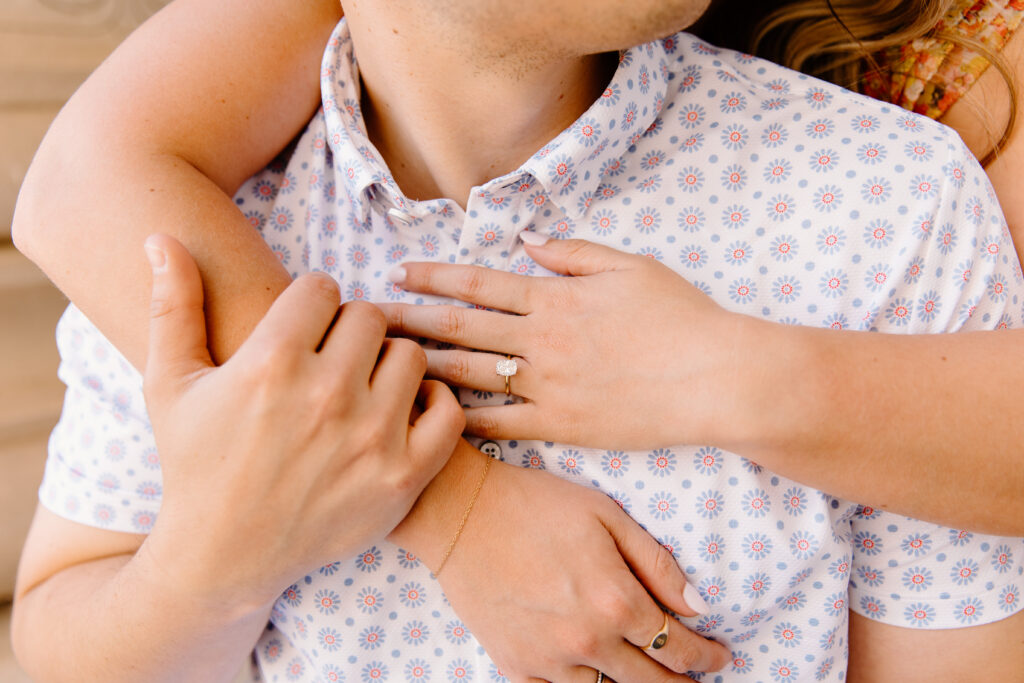
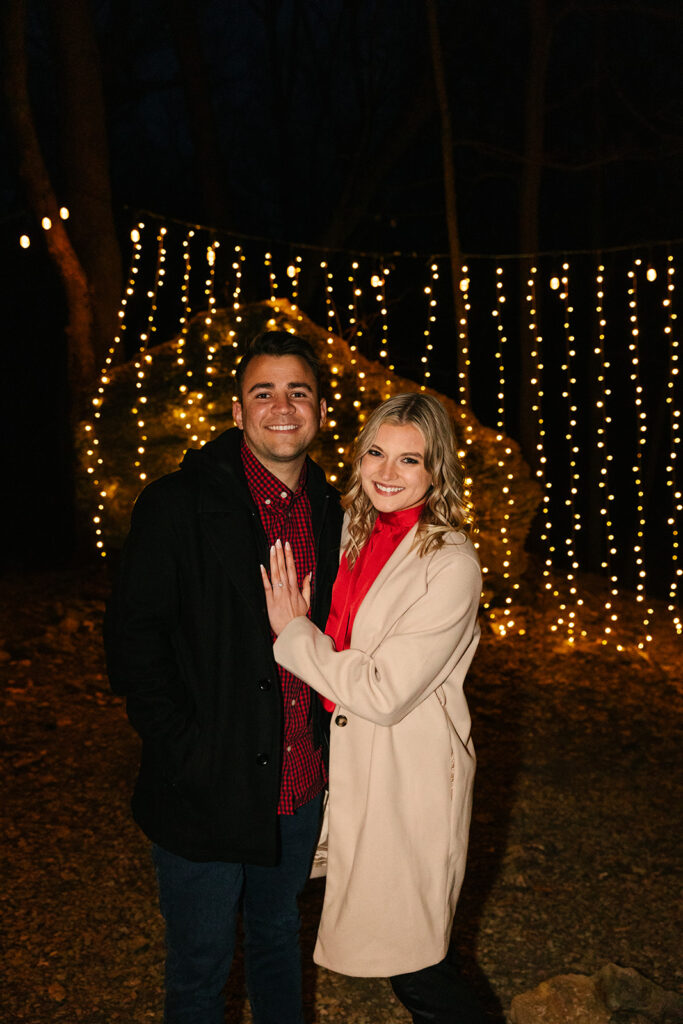
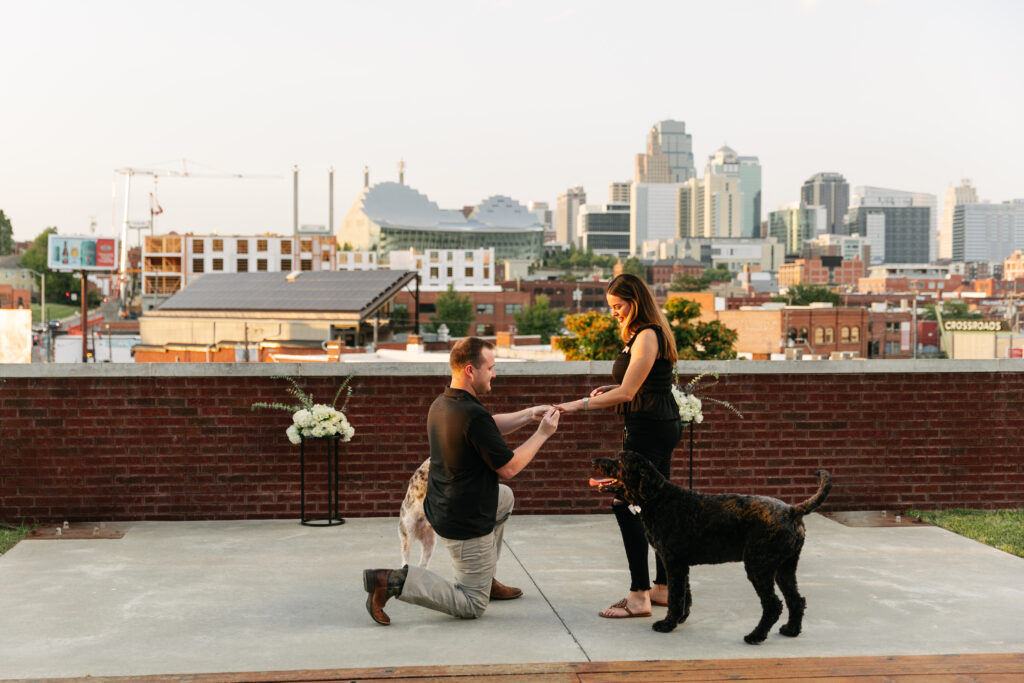
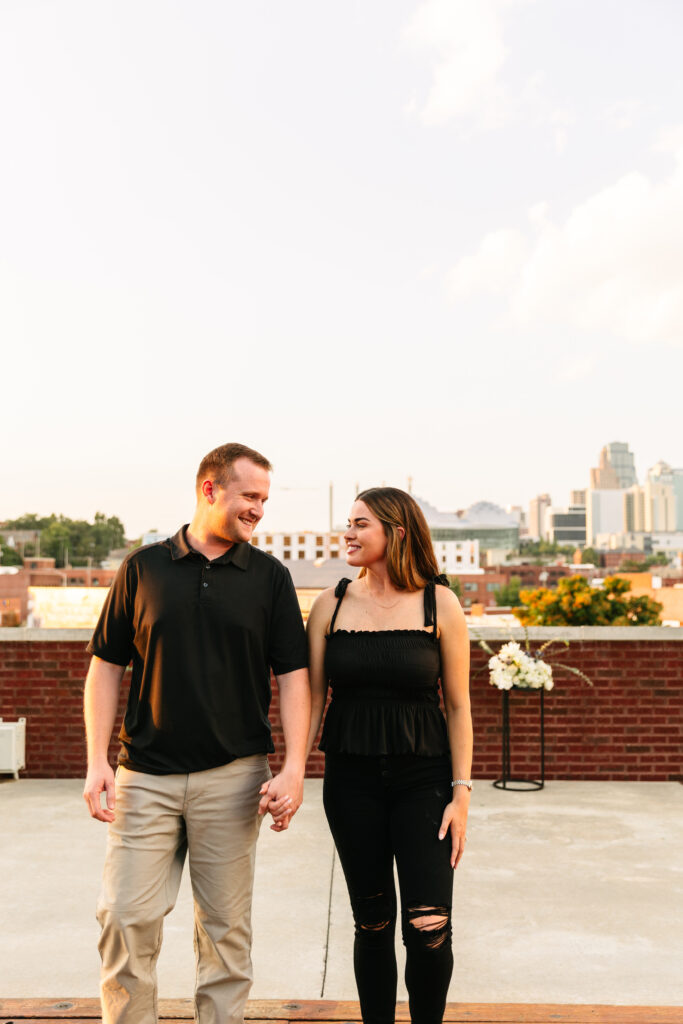
When it comes to proposing the location can be as intimate, special, extravagant, or quaint as you’d like. Whether it is a place that already holds sentimental value, or a place where you are establishing sentimental value, it will be a magical moment! I’ve put together some tips on choosing the perfect proposal location so you can pick a place that’s right for you.

Plan For The Season
Summer, Spring, Winter, and Fall all bring different climates, depending on where you are in the US. Here in KC there will be a big difference in temperature and weather from one season to the next. I recommend planning for the season and always having a back-up plan if you decide on an outdoor proposal! You never know when it may rain, or snow.

Pick A Place You Love
A parent’s house, your favorite coffee shop, a park/trail you frequent, or just a place you love to go together are all great options when it comes to proposal locations. You can deck out a parent’s backyard, or meet at a local park. But picking a place you frequent and/or love going to together makes the moment even more special!

Think About The Afterparty
It is common to have a gathering with friends and family after the proposal. Which is something to take into consideration when deciding on a location. If you pick a location that can serve as a proposal location and an afterparty location you can kill 2 birds with one stone. If you choose an outside location, such as a park, you may have to do some additional planning for the after party!


Regardless of where you decided to pop the question, the day will be one to remember. Just trust your gut and don’t hesitate to ask friends and family for advice and help!
A wedding reception offers so many different ways for you to express yourselves as a couple and really make the experience unique. One fun way to do so that continues to grow in popularity is to create personalized wedding reception drink specials! There are plenty of ways you could do this, but I’ll break down a few of my favorites below.
The Newlyweds
One traditional way to do this is to pick you and your partner’s favorite drinks to serve as a special! It is a fun way for the guests to get to know you both a little better, and to really immerse themselves in the reception experience.
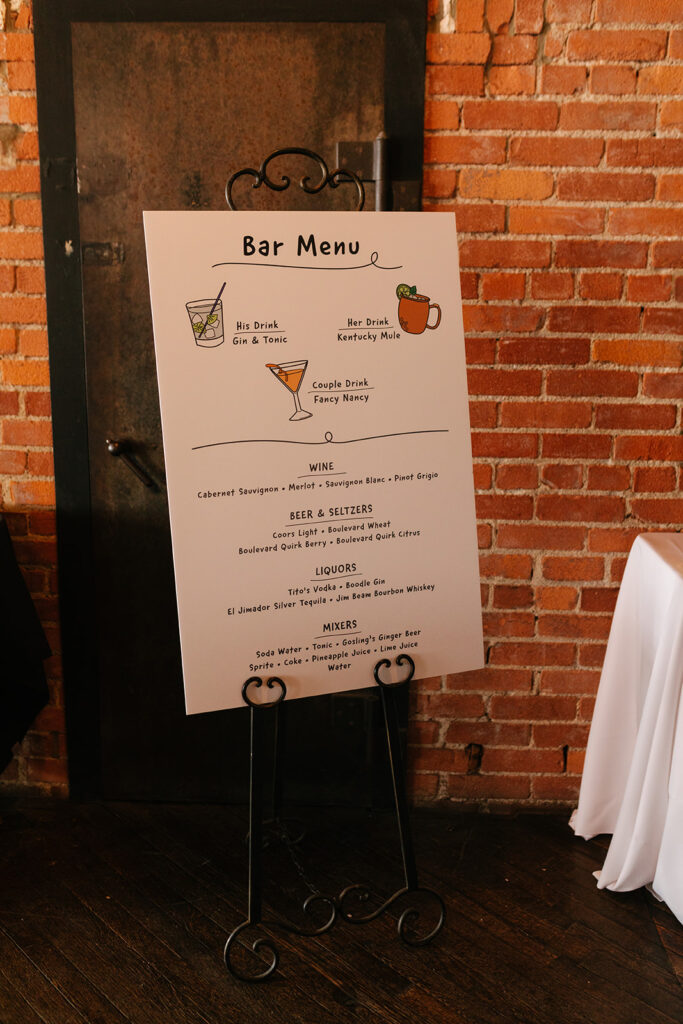

The Pets
Another great way to create your drink specials is to name them after your favorite furry friends! One cat, one dog; one bunny, one bird; two fish. It doesn’t matter what your combination is. This is a wonderful way to include your pets in your special day without actually having them present.


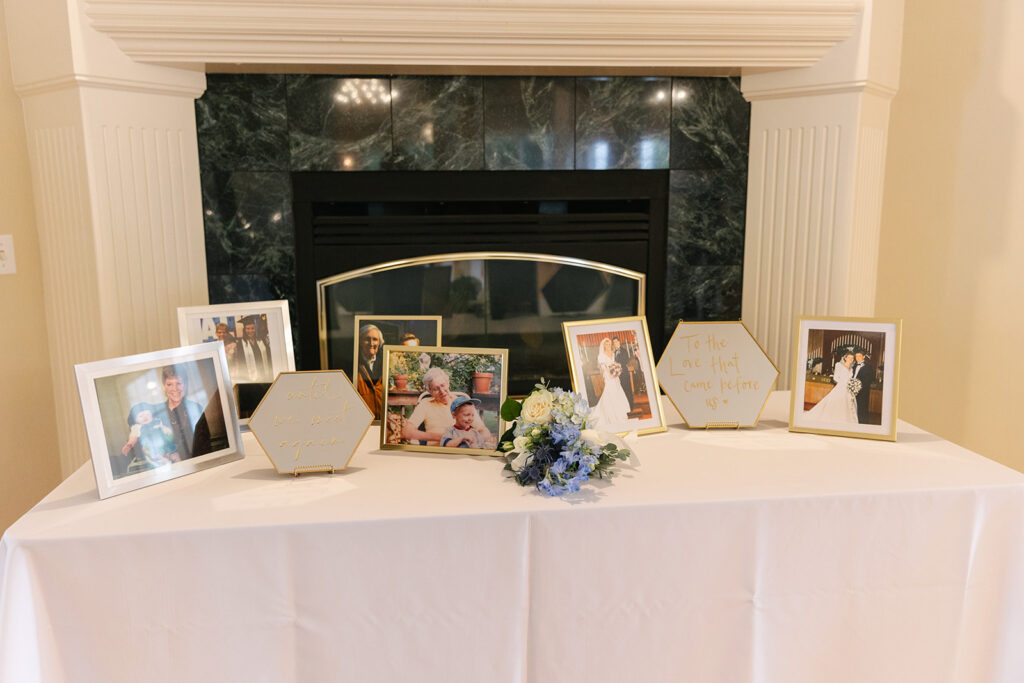
The Ones Who Couldn’t Be There
There are multiple ways to remember loved ones who sadly cannot be with you on the day of your wedding. Commonly, couples will set aside a table with picture of them with their loved ones who couldn’t be there. You could also dedicate a special drink to them! It could be their favorite old fashioned, or just a drink that reminds you of them. This is another great way to include them in your big day.

I hope these ideas helped you decide on how to customize drink specials for your big day!
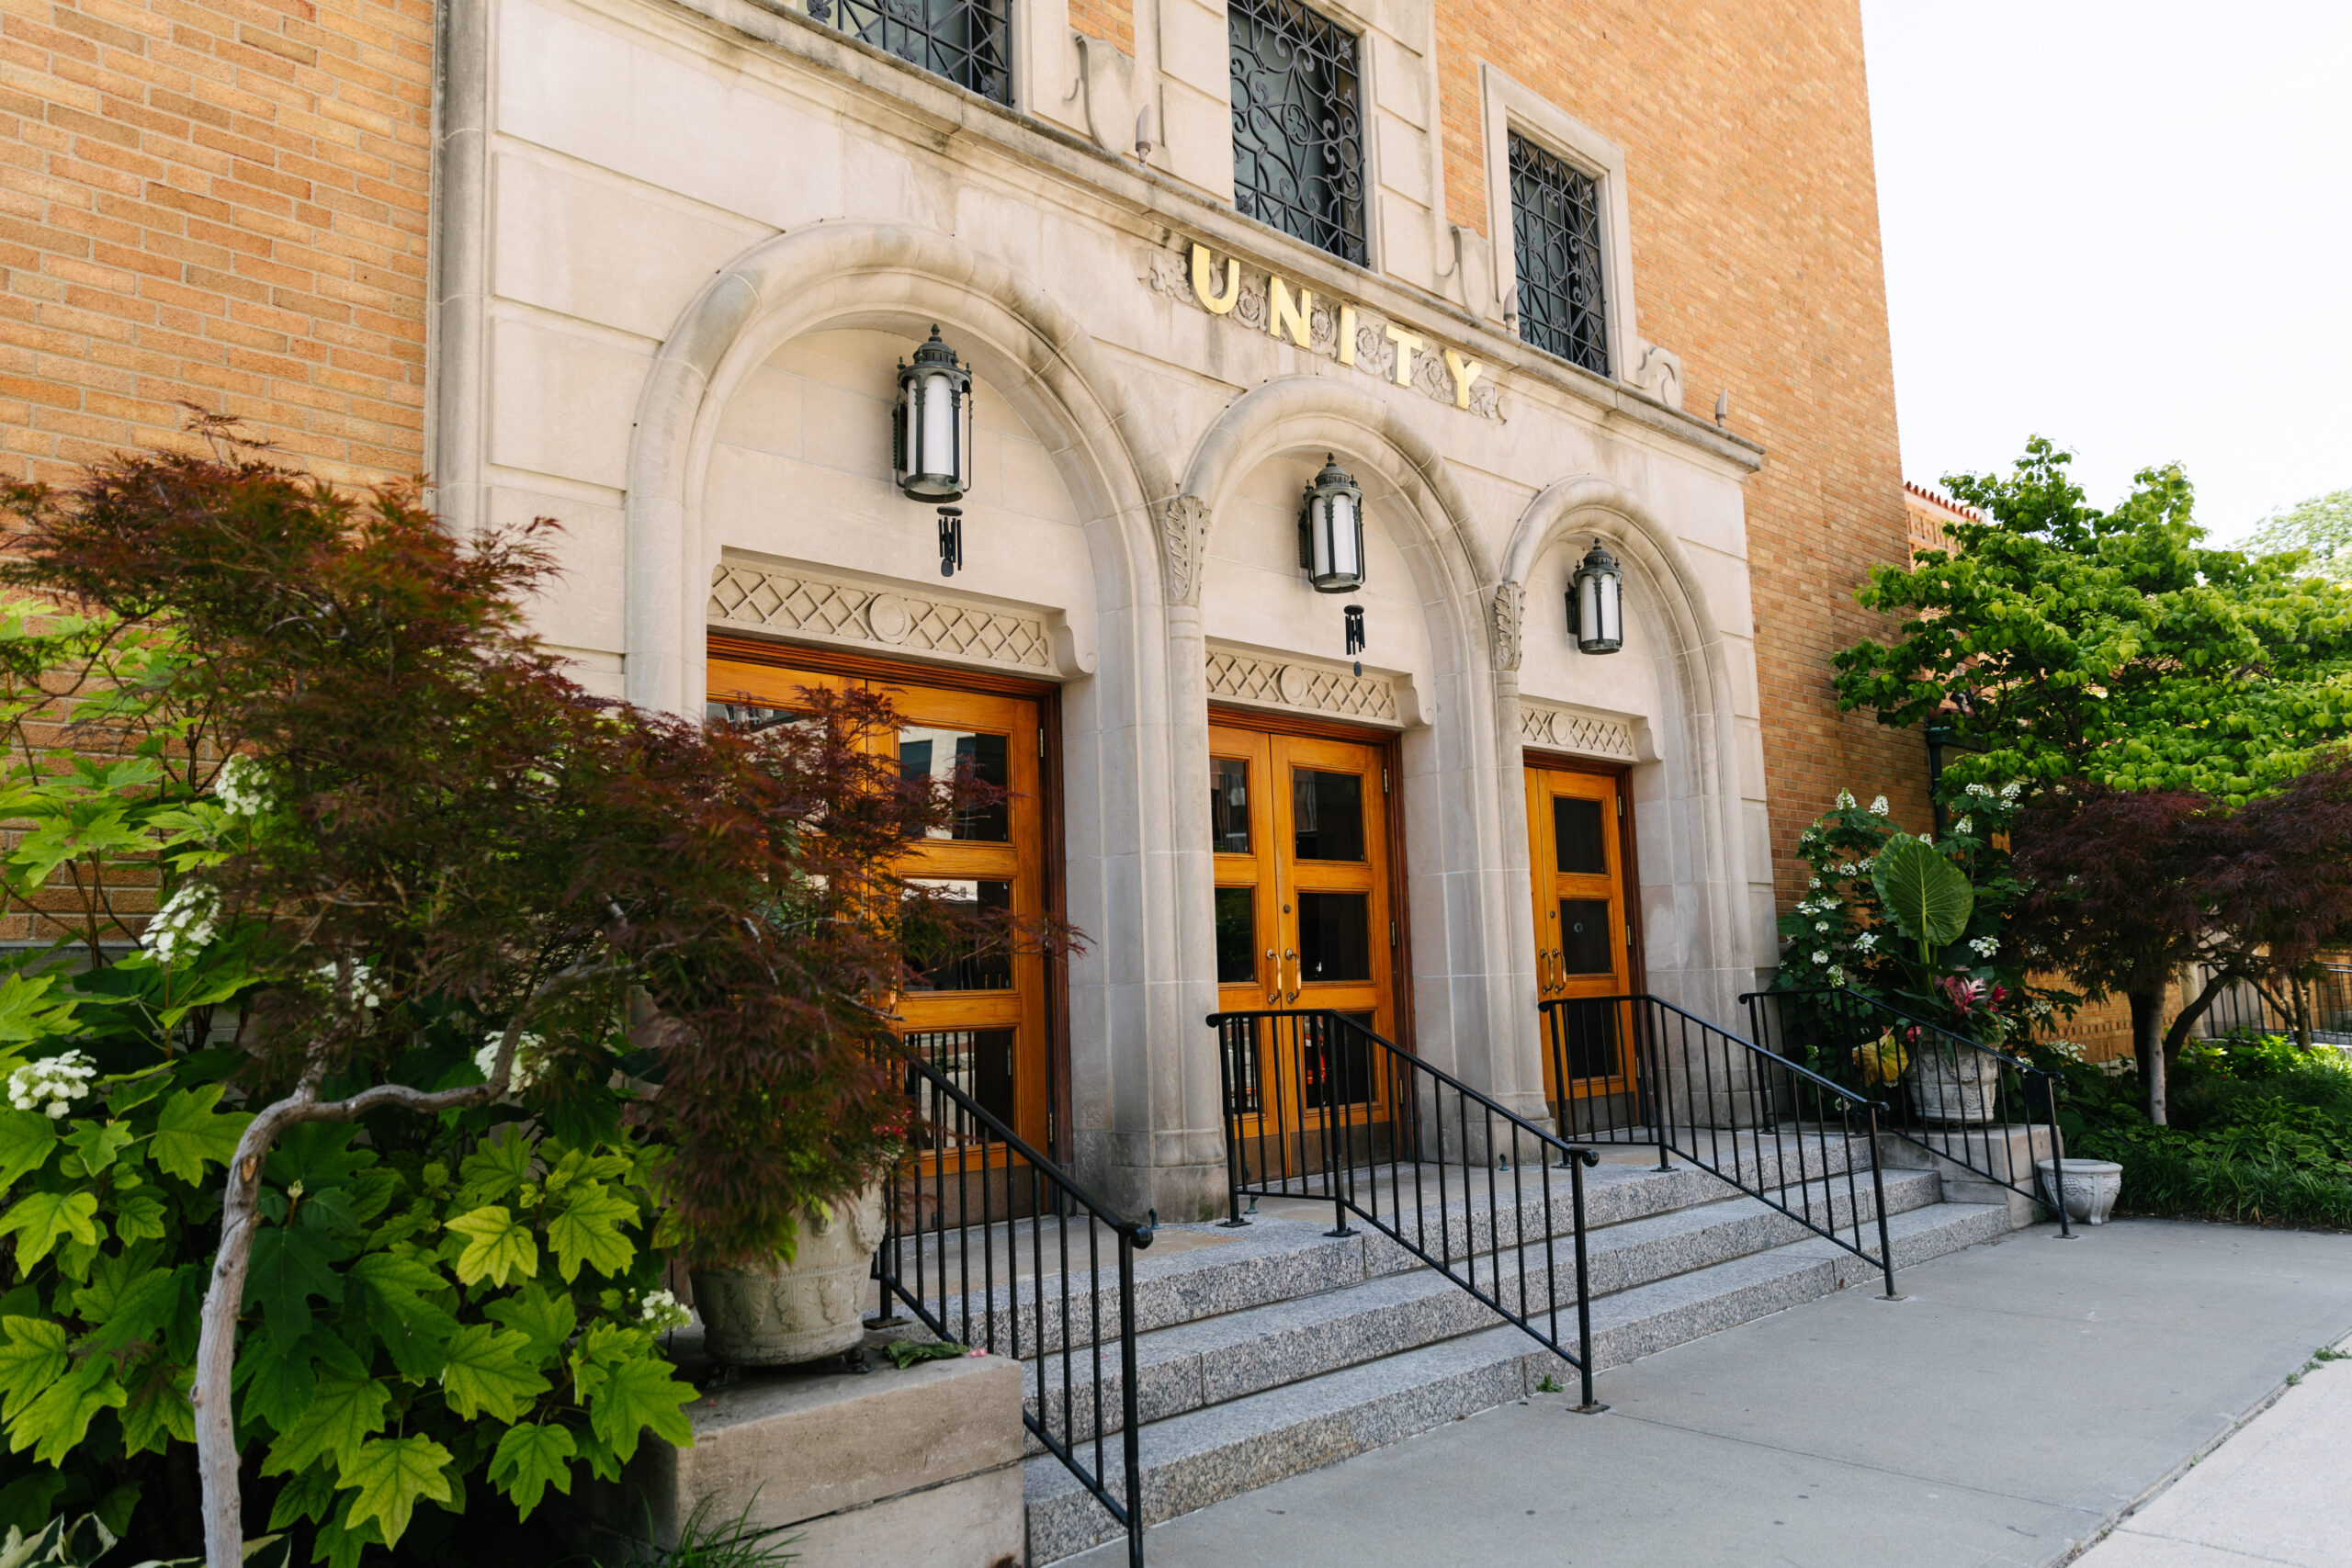
Some say that tradition rivals romance when it comes to weddings. This past spring I had the opportunity to capture a wedding at Unity Temple and Simpson House that was the perfect blend of tradition and romance. The ambiance, the attire, and the love the bride and groom had for each other was unmistakably romantic. The ceremony and reception were traditional and timeless. It was the perfect day!
The wedding party wore light green, which complimented the greenery in the bouquets beautifully! The pops of yellow in the bouquets made the sun appear to shine brighter and matched the lemon reception decor perfectly. The reception was set up like a quaint afternoon garden party. The Simpson House offered a beautiful space with wonderful amenities.
This day was beyond fun, as the wedding party was so wonderful to be around. The bride and groom were so spunky and I had the best time capturing their laid back moments, along with the serious ones. We couldn’t have asked for a better day. I feel very blessed to have been able to capture all the special moments of the first day of their forever!
Wedding Day Vendors:
- Photographer: @natalie.nichole.photos
- Planner: @hoochandhoney
- Florals: @daylight flora
- Venue: @simpsonhouse
- Bakery: @bloombakingco
- Catering: @garozzos
- Band: @commonthreadsband
- Hair/Makeup: @Hellolovelykc
- Transportation: @agenda.usa


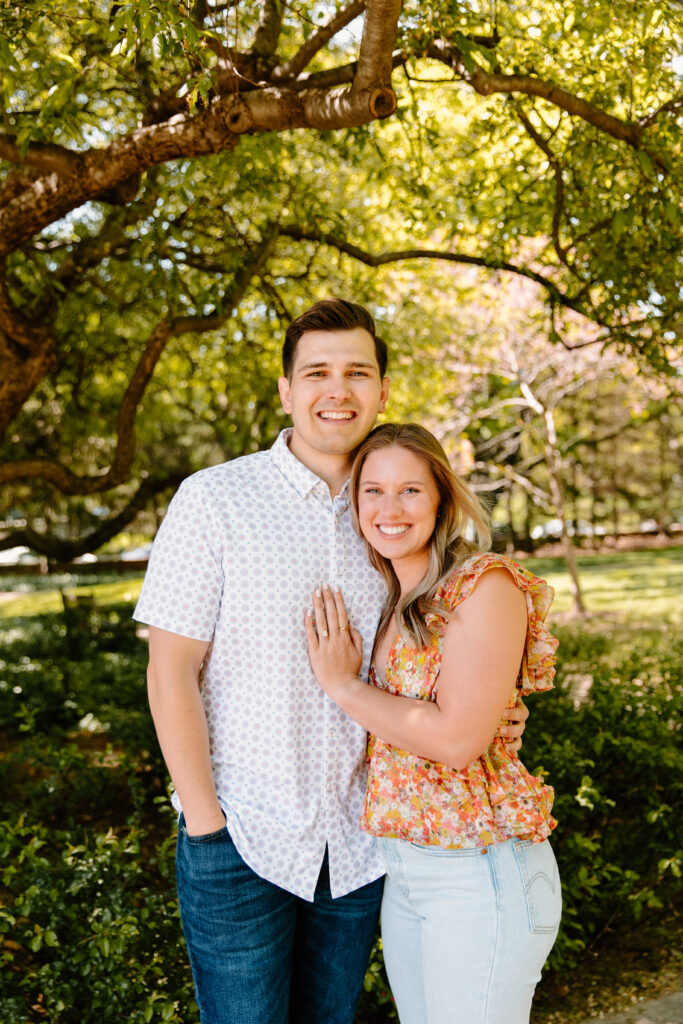
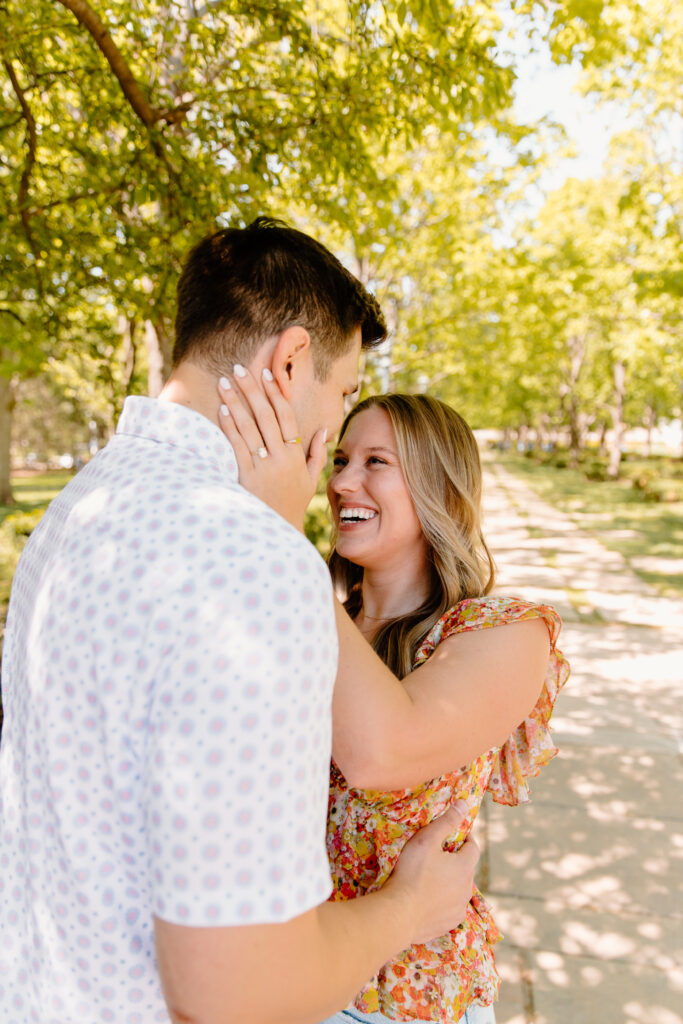
Jacob and Junmo met me for a lovely afternoon at Liberty Memorial and Union Station to capture their engagement session! They have been together for 10 years. I had a wonderful time learning about their story and plans for the future.
The couple met when Jacob first moved to Seoul, South Korea for work. Shortly after moving in, Jacob and Junmo met online and made plans to meet for the first time in person. Jacob had yet to get his first paycheck from his new job. He didn’t have enough money on his transit card to make it back from meeting Junmo. He had his American credit card, but couldn’t use it to get cash out. So he reached out to Junmo and told him that he wouldn’t be able to meet because he didn’t have enough money on his transit card to get back home. Junmo happily offered to make the trip to visit Jacob instead of meeting half way and the rest is history!
They knew marriage in South Korea wasn’t an option because same-sex marriage is still illegal. The idea of getting married came up often when discussing moving to the US! After moving to the US, they decided to make it official on April Fool’s Day to commemorate how foolish it was they couldn’t have married sooner.
I learned that they enjoy going on brunch dates so they can spend the rest of the day at home together. They are looking forward to being boring together. Loads of laundry, doing taxes, and playing walking games are in store for the future! They also plan to go back to South Korea within the next 20 years so they can visit some of their favorite spots together.
I truly enjoyed walking around Union Station and Liberty Memorial while getting to know them. Cheers to a long and happy marriage, Jacob and Junmo!


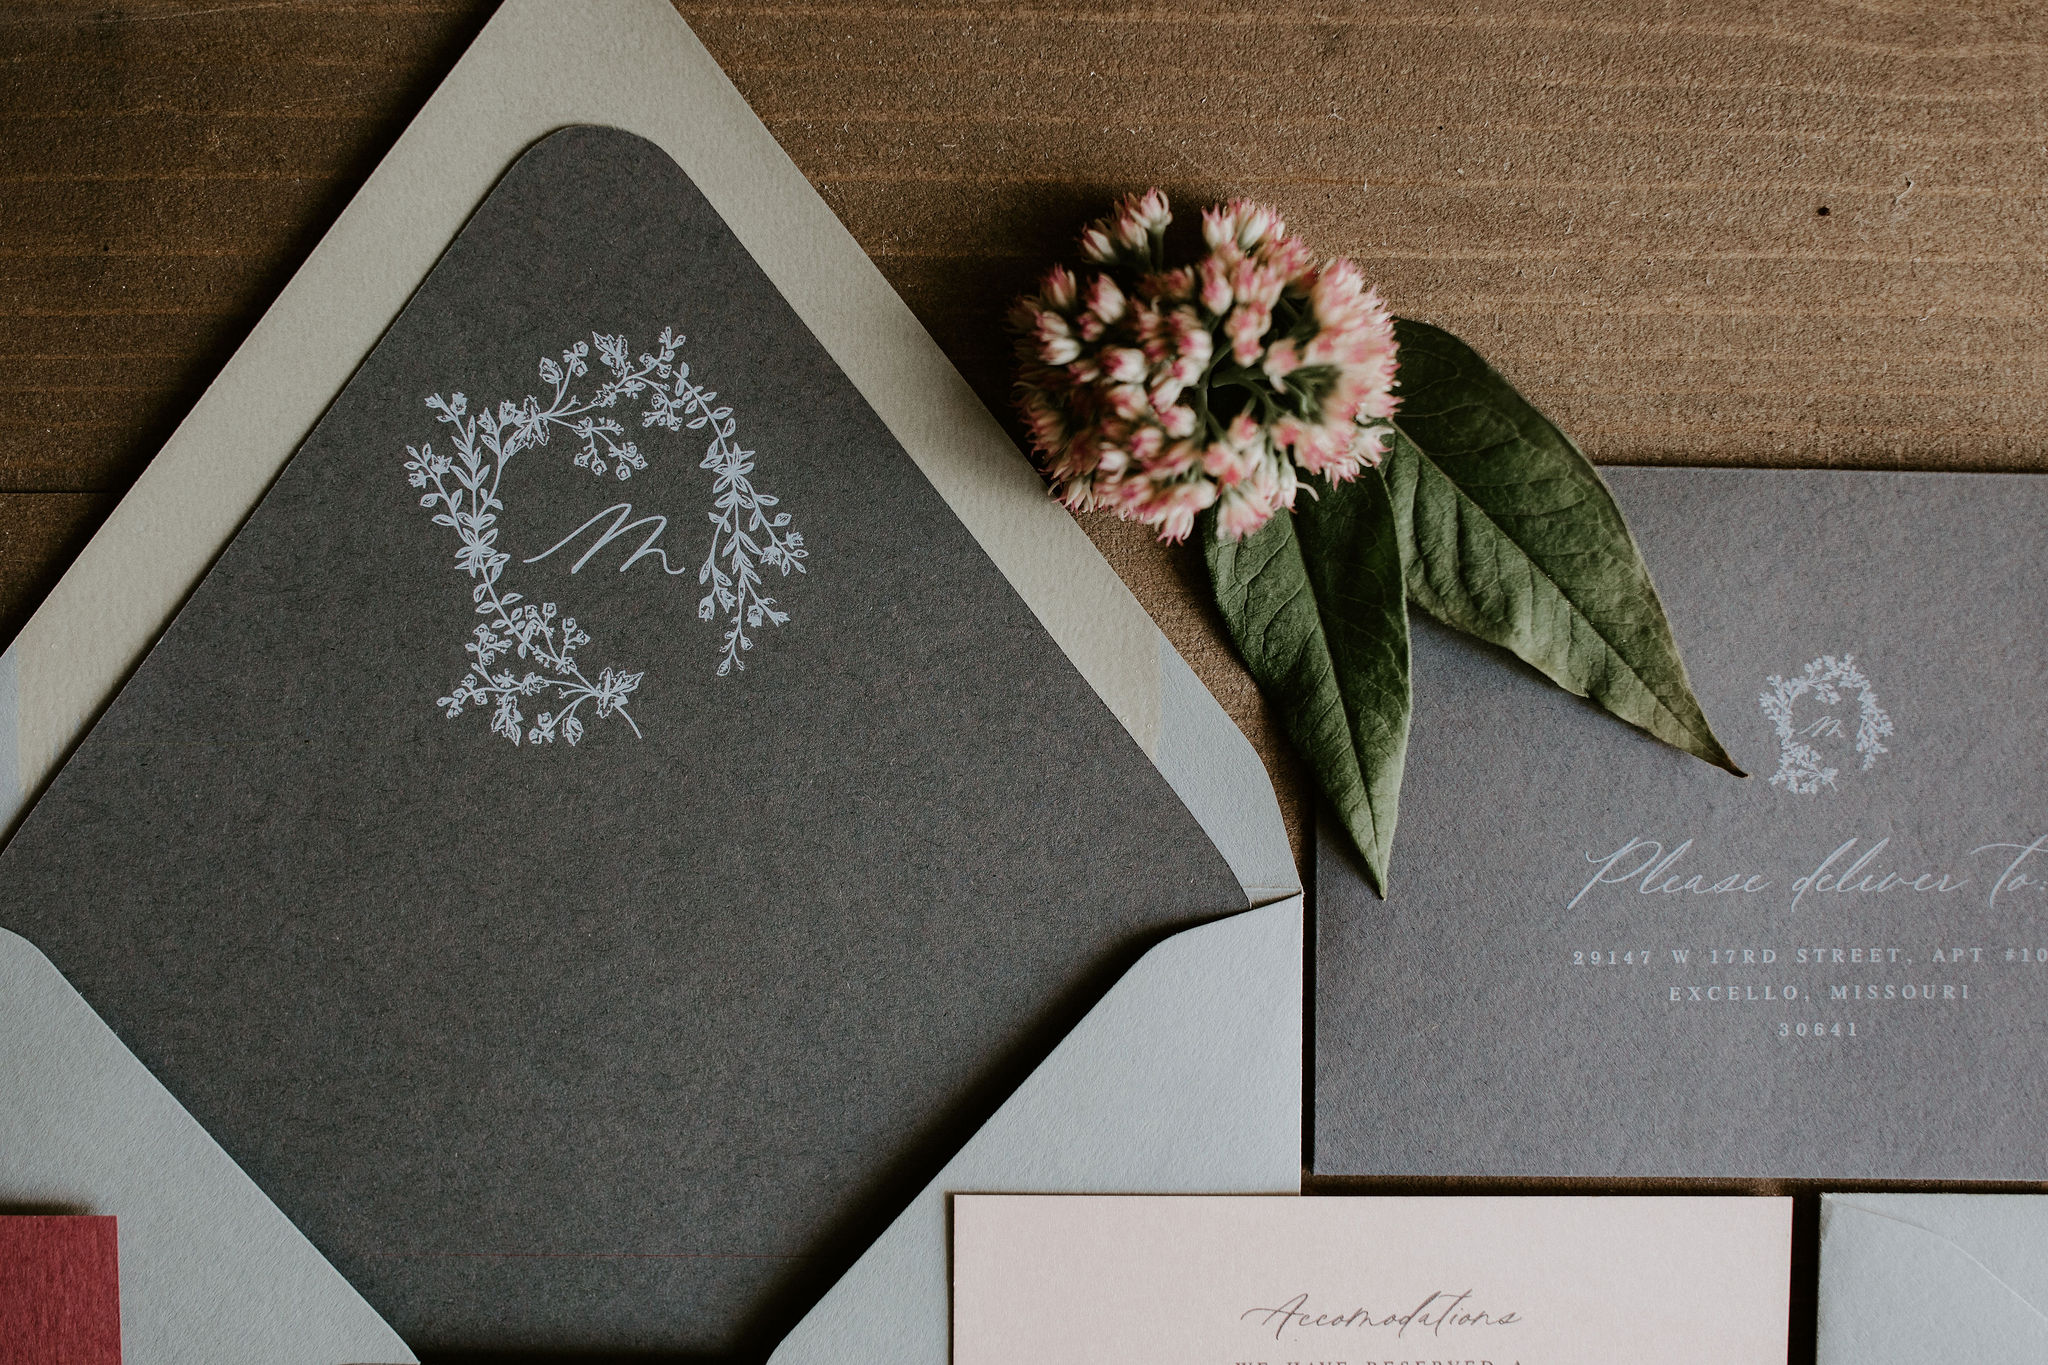
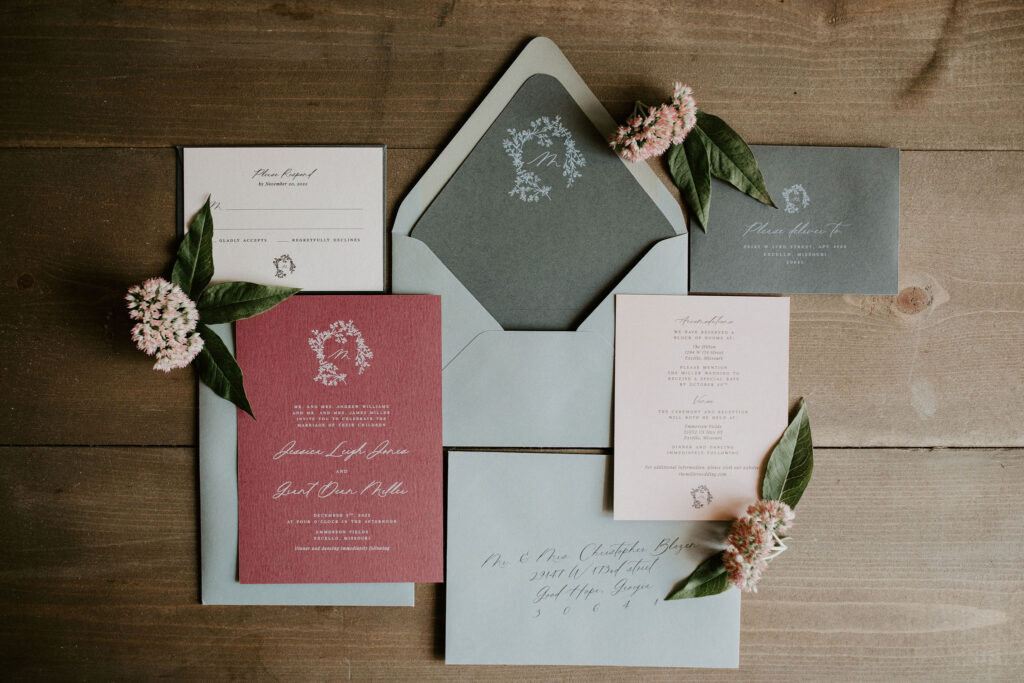
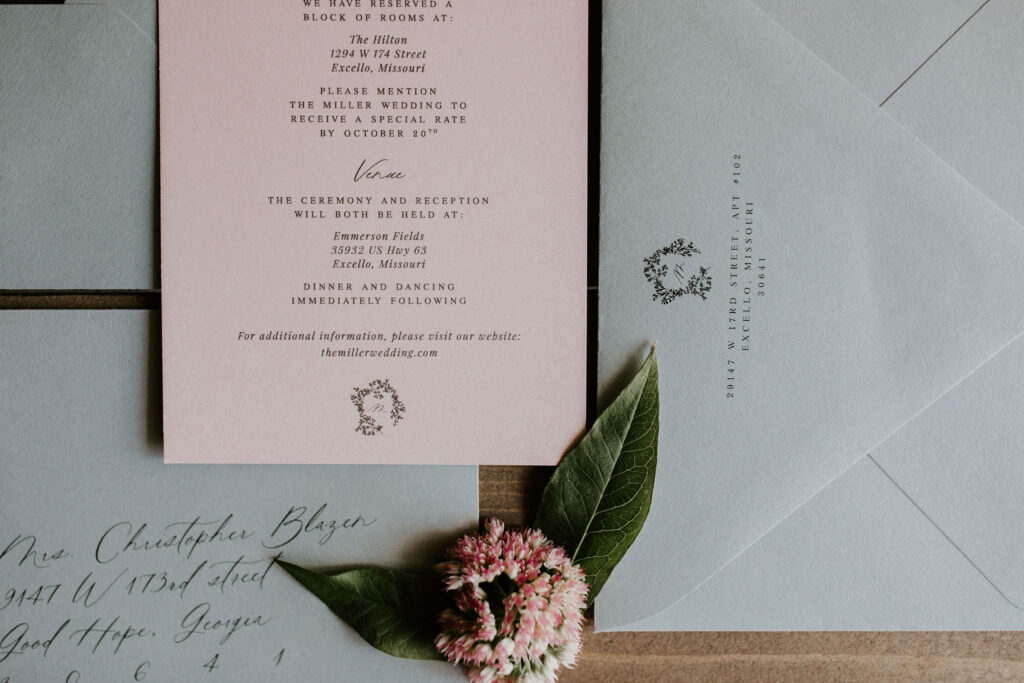
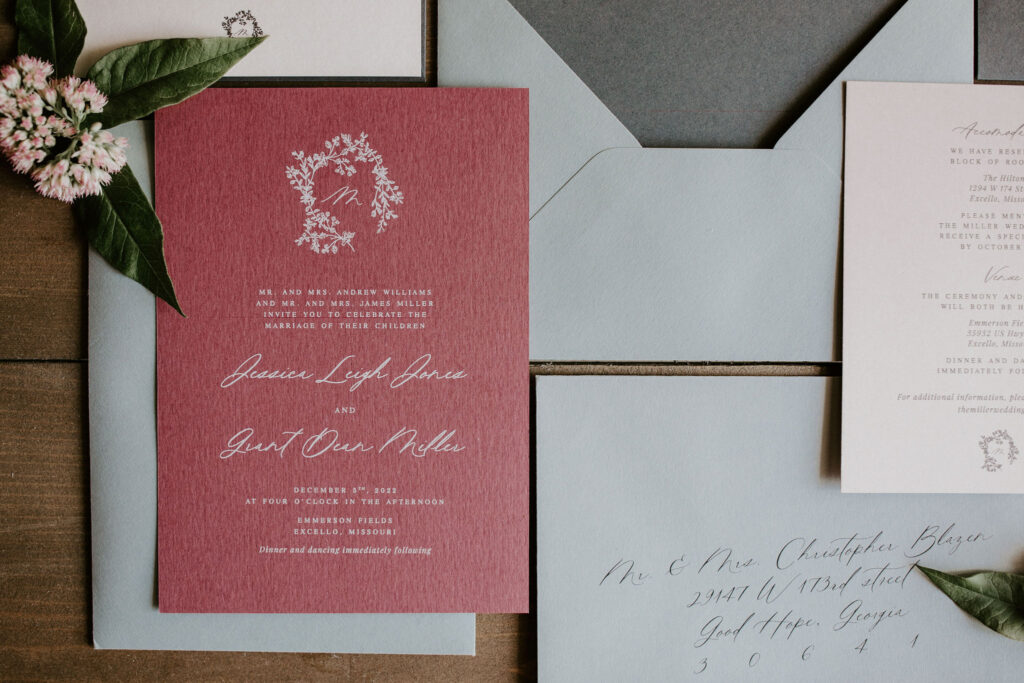
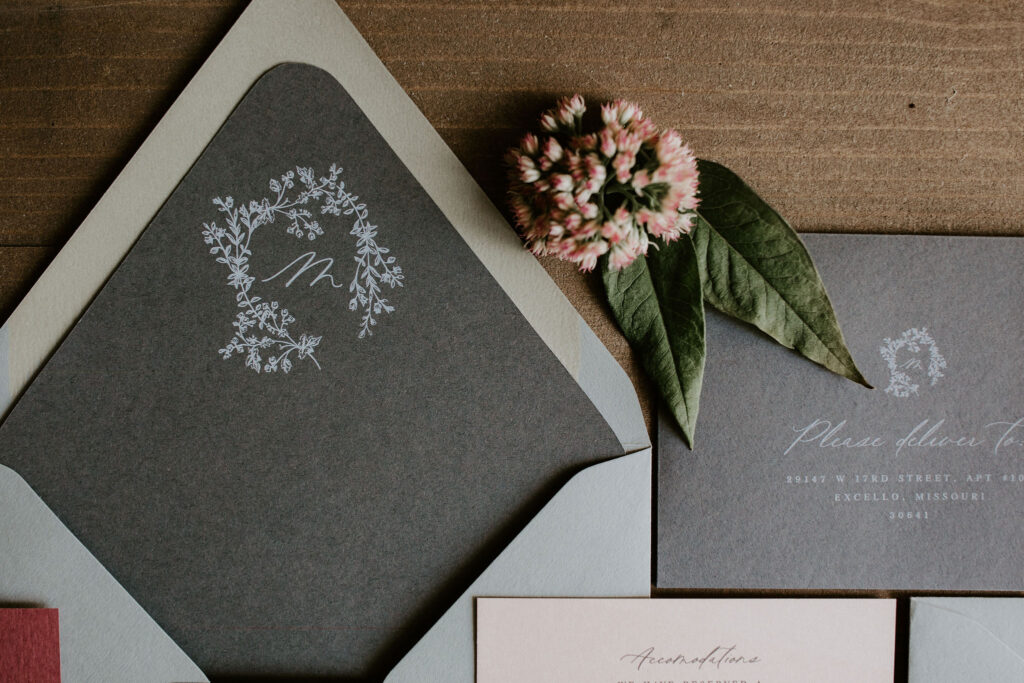
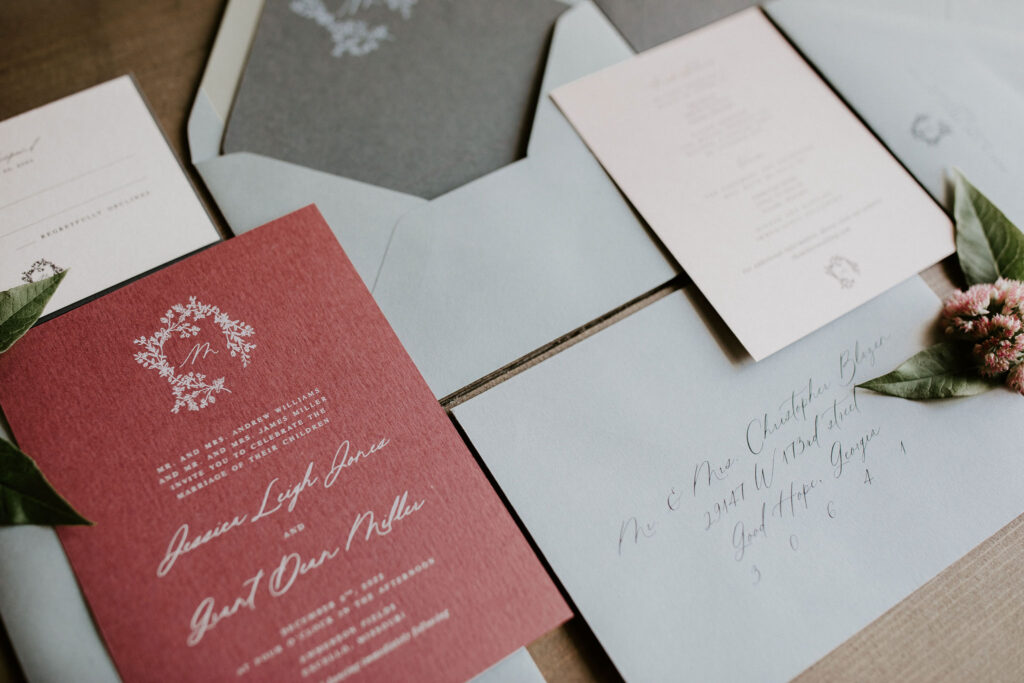
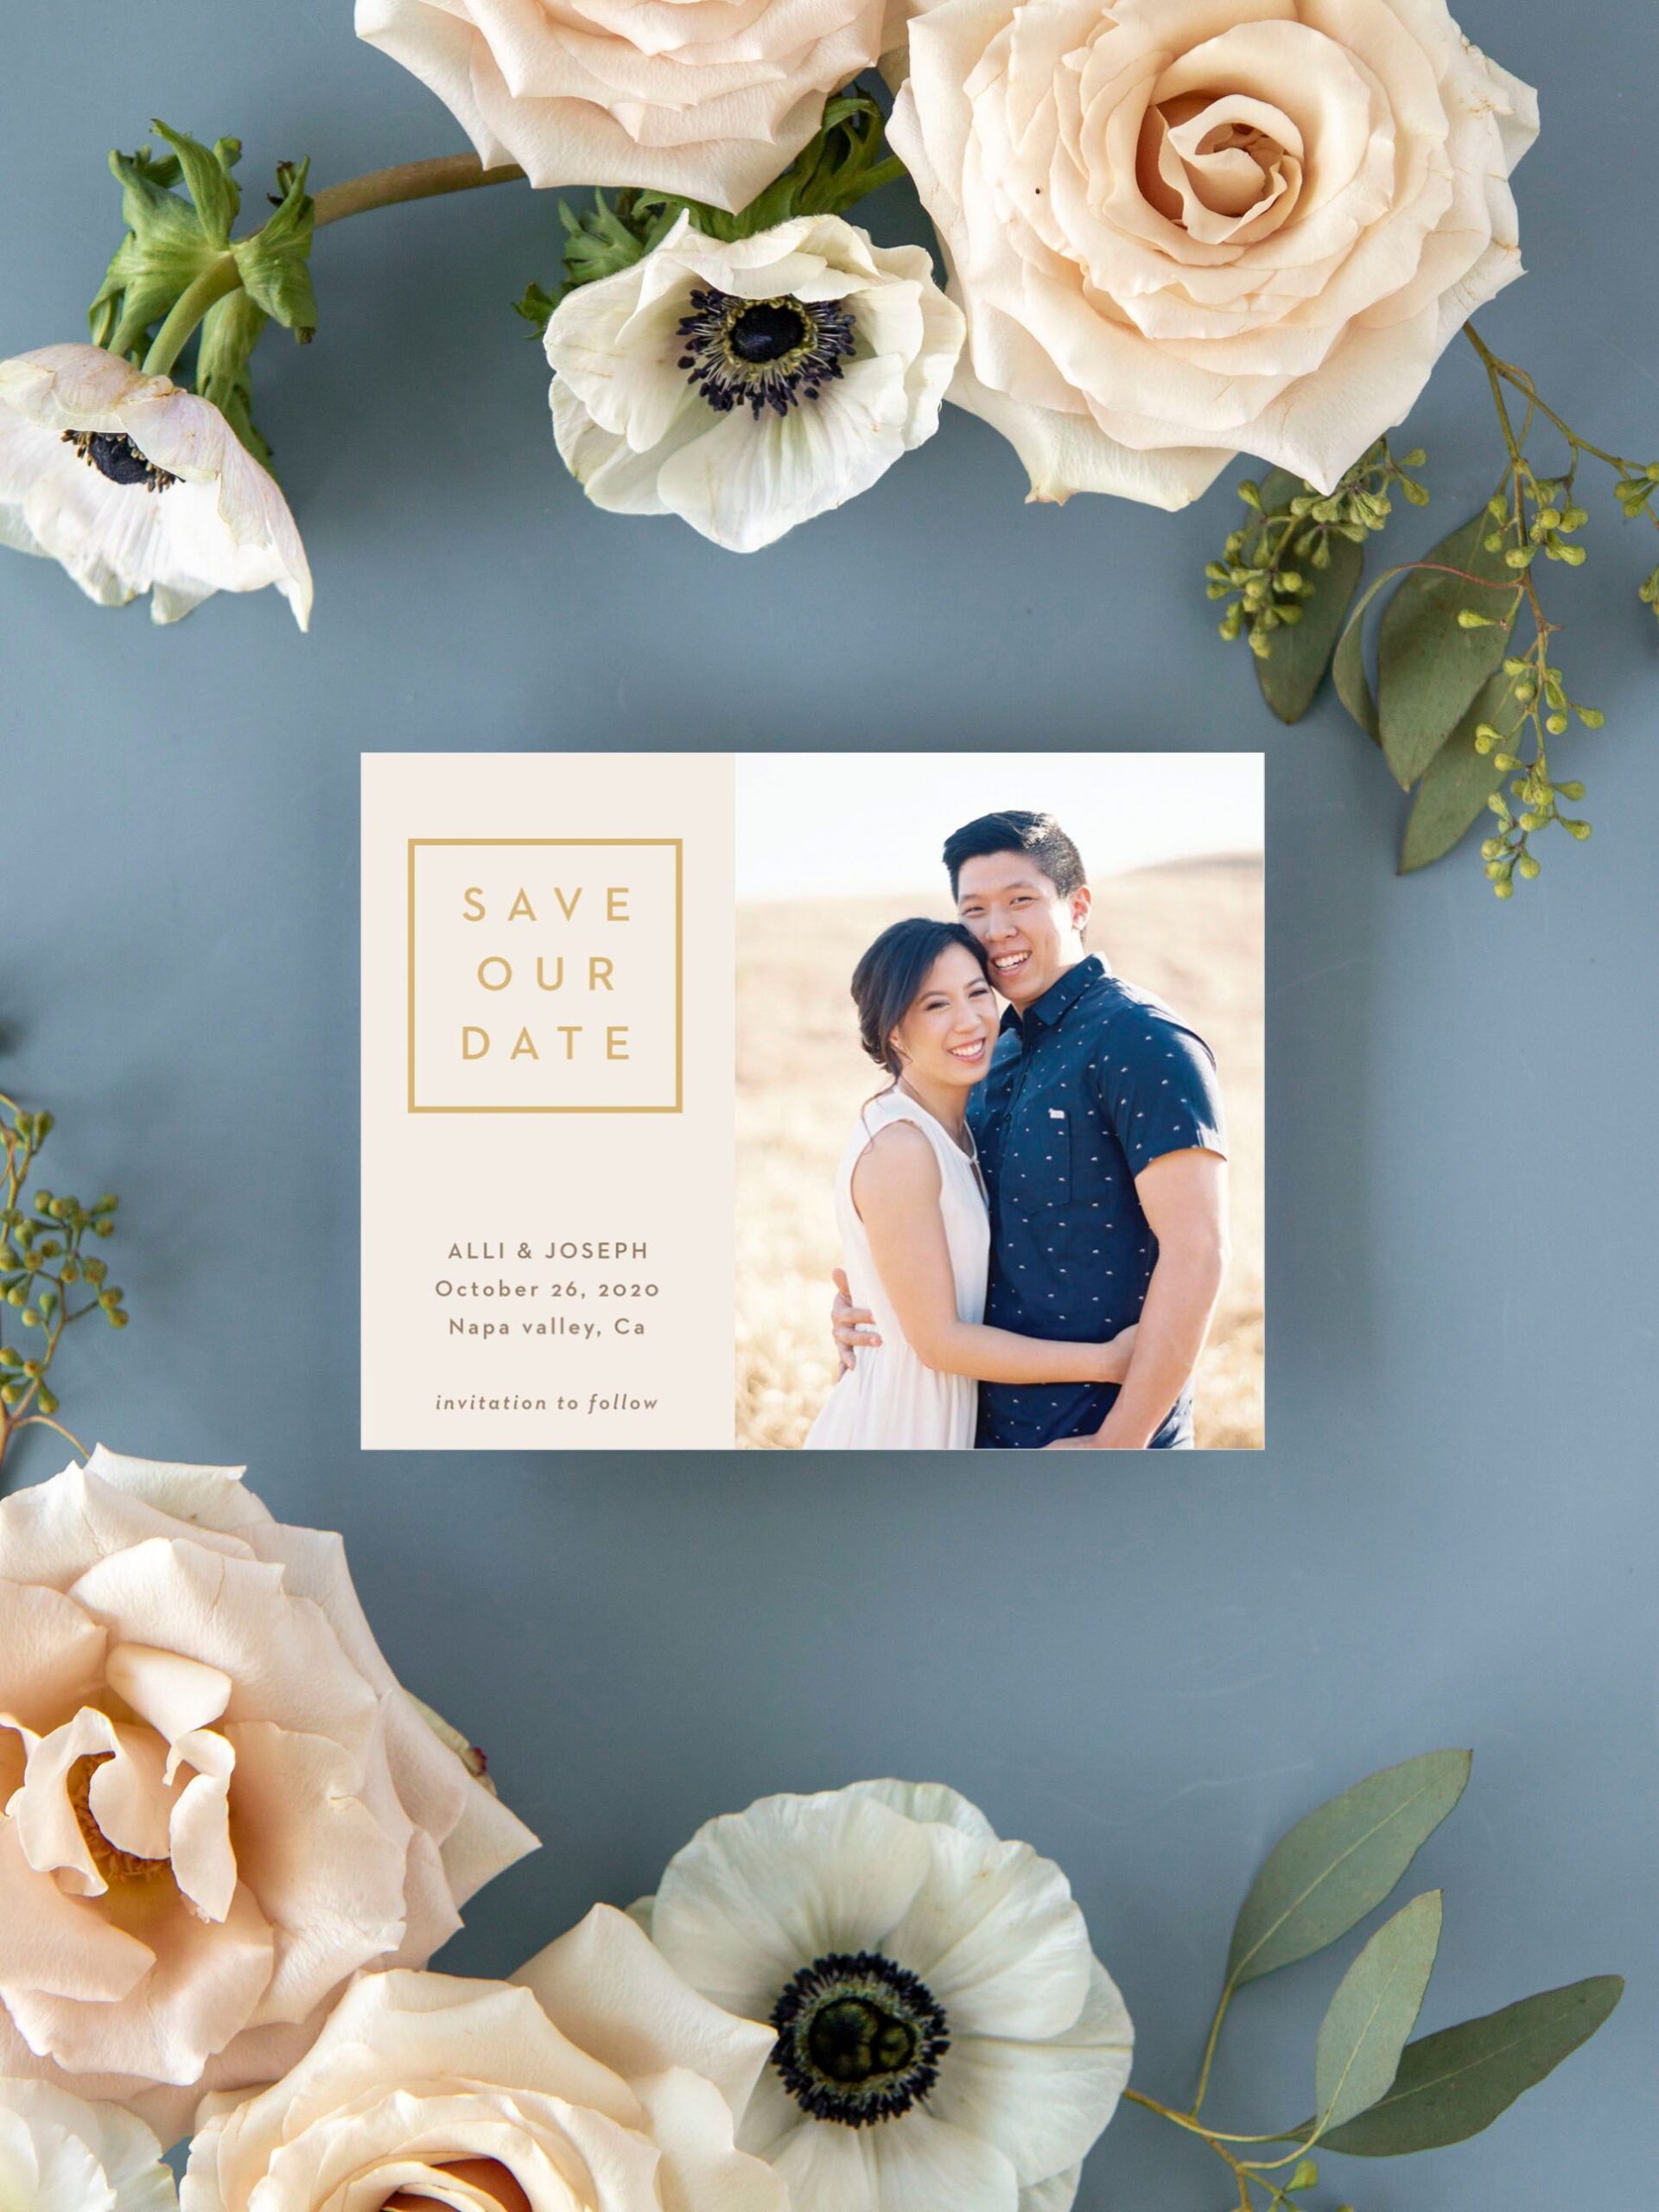
When you first sit down to create a basic wedding stationery timeline, it can feel daunting, tricky and a little bit confusing. Am I right? There are just so many moving parts when it comes to wedding stationery! From knowing when to inquire with a wedding stationer to knowing when to mail your invitations, it can be tough to keep track of everything.
Well, my friend, I’m here to give you an inside look at a basic wedding stationery timeline. That way, you’ll know exactly when to create all of your wedding stationery items, key places to pad your timeline, and how to create your own wedding stationery timeline based on your wedding date.
What To Include In Your Stationery Timeline
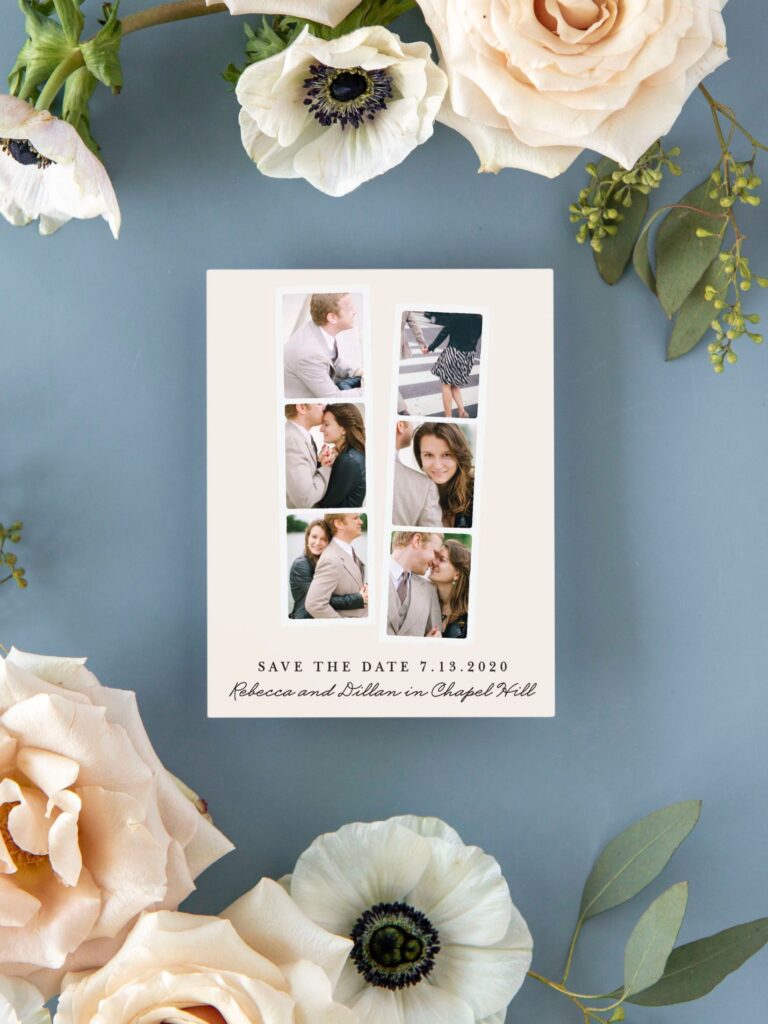
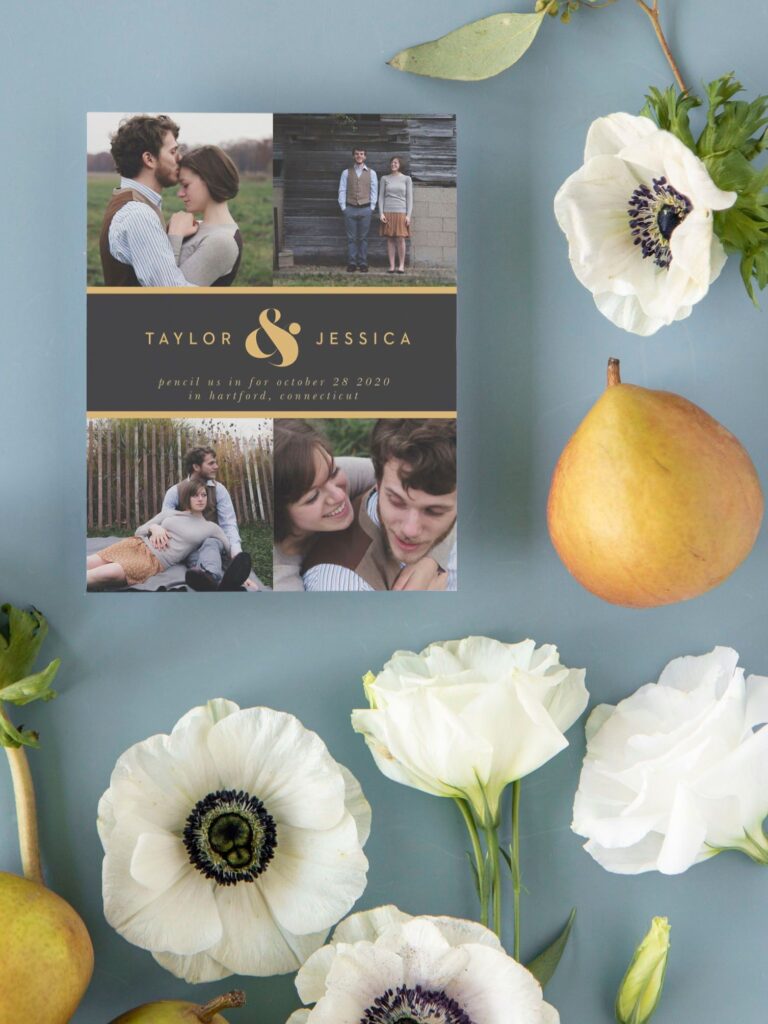
You will need all types of wedding stationery items for your big day. Save the dates, invitations, day-of stationery and thank you cards are the key stationery items you’ll need to create. All of these stationery pieces help to communicate important details with your guests throughout the entire wedding planning process.
Save the Dates
Inquire / Get Started: 12-16 months before your wedding date
Mail: 8-12 months before your wedding date
Plan to start designing your save the dates anywhere from 12-16 months before your wedding date. This will give you plenty of time to create a design that you love, get them printed, assemble them carefully and pop them in the mail.
It’s recommended to mail your save the dates around 8-12 months before your wedding date. This is the first announcement you’ll send to your guests about your wedding. So, it’s important to clearly communicate when + where your wedding will be taking place. That way, they can quite literally save the date and begin making arrangements to celebrate with you on your big day.
Invitations
Inquire / Get Started: 6-8 months before your wedding date
Mail: 10-12 weeks before your wedding date
Starting your invitations 6-8 months before your big day might sound super early. But, there is a lot to do to prepare your wedding invitations for mailing!
You’ll want to create a design you love and that feels like a reflection of you and your big day. This process can take approximately 4-8 weeks if you design custom wedding invitations.
From there, you’ll want to plan on around 2-3 weeks for your invitations to be printed and shipped to you. This timeframe may change depending on the printing method you choose (digital, foil stamping, letterpress, etc.)
Then, budget another week or so to assemble your invites with care so they are all ready to be mailed!
Mailing your invitations 10-12 weeks is ideal. The post office tends to take its sweet time delivering mail, so padding the timeline with that in mind is important. You also have RSVPs to collect, as well, so you want to give your guests plenty of time to respond.
Quick Tip: If you’re short on time, have your guests RSVP on your wedding website! QR codes are super handy for this. This will save your guests from having to mail back a response card and potentially getting caught up in the mail. This will also help your budget by saving you money on printing and postage. It’s a win-win!
Day-of Stationery
Inquire / Get Started: 6-8 weeks before your wedding date
In-Hands: 1-2 weeks before your wedding date
Once your invitations are officially in the mail, you’ll be ready to dive right into creating your day-of stationery.
Starting your day-of stationery designs about 6-8 weeks before your wedding is perfect. You may not have all of the details nailed down or finalized, but that’s okay! Start creating the designs and you can always flow in the final details right before printing.
Plan on printing to take anywhere from 1-3 weeks. Just like your other stationery, this timeline might change depending on the printing method you choose (digital, foil stamping, letterpress).
No matter what you choose, I recommend having all of your day-of stationery in-hand and ready for your big day about 1-2 weeks before your wedding, if possible. That way, you’re not worrying about your stationery right up to the day of your wedding—you’ll be all set!
Thank You Cards
Inquire / Get Started: 6-8 weeks before your wedding date
In-Hand: 1-2 weeks before your wedding date
Mail: 2-4 weeks after the wedding
As you design your day-of stationery, go ahead and create your thank you cards, too!
Having them in-hand around 1-2 weeks before the wedding day will be so nice. That way, you don’t have to worry about scrambling to create or purchase thank you cards when you return from your honeymoon. You can simply mail them to your guests once you’re home.
Plan to mail your thank you cards anywhere from 2-4 weeks after your wedding day. You can even send them sooner, if you want to! Just make sure to mail them pretty soon after your big day. Your guests will love that you thought of them and took the time to say “thank you”.
Where + Why To Pad Your Timeline
When I create wedding stationery timelines for my couples, I always add a little extra padding here and there. I highly recommend you do this for your stationery timeline, too!
Why? Because, we’re all human! Life happens, things come up and plans will shift and change along the way. You’ll be planning your wedding most likely for a whole year — if not longer. There’s a lot that can happen during that time and it can be hard to know exactly what might come up along the way.
Here are some key places I like to add a little wiggle room to the stationery timeline:
Printing + Ordering
If you plan to do digital printing for your invitations, this process can take anywhere from 1-2 weeks to complete. So, rather than planning on just 1 week for printing and ordering time, go ahead and plan on the full 2 weeks. That way, if everything is ready sooner — awesome! You’ll be ahead of schedule.
It’s easier to enjoy the extra time instead of stressing that there isn’t enough.
Assembly
Let’s be honest, this is most likely your first time assembling invitations. It’s definitely not hard to do, but there are a lot of steps involved and it’s very hands-on. If you already have a busy schedule or aren’t very confident with “crafty” projects, I recommend padding this time a little!
Usually, I like to give my couples 1 week for assembly time. This is usually plenty of time to assemble invitations and get them ready for mailing. Even if you have 200 invites to assemble!
Mailing + RSVPs
Mailing is one of those things that once you drop off your invites it’s completely out of your hands! You’re sort of at the mercy of the post office to mail your beautiful invites. That can be a little bit stressful.
To help ease the stress, plan to mail your invitations as soon as possible. I love mailing invites around 10-12 weeks before your wedding date. This is a good amount of time for your invites to be delivered to your guests. It also gives you time to re-mail or hand-deliver any invitations that may not arrive at their destination.
This timeline also gives your guests time to respond with their RSVP cards. I mentioned this above, but if you’re short on time or a little concerned about receiving all of your RSVP cards, go ahead and have guests respond on your website! This is such a fast and easy way for guests to let you know if they’ll be at your big day or not.
When it comes to padding your timeline, I recommend adding a little extra time anywhere in the process that gives you stress! This will help easy some of that for you and make the process that much more enjoyable every step of the way.
How To Create Your Wedding Stationery Timeline
Now that you know how long the stationery process can take and where to add some wiggle room, let’s create your wedding stationery timeline!
The simplest way to build your timeline is to work backwards from your wedding date.
From there, you can plan when you need to have your day-of stationery in-hand, when to mail your invitations and when to also mail your save the dates. You can even look forward and plan when your thank you cards should be delivered to your guests after your big day.
The other important thing to know is what printing methods you want to do. This will help you determine how long you need to plan for printing. If you’re unsure, just pad your timeline! That way, no matter what method you choose, you know you have plenty of time already planned for in your timeline.
To help you get started, I’ve built a basic stationery timeline below as an example:
Wedding Date
— October 26, 2024
Save the Dates
— Get Started / Inquire: June 26, 2023 (16 months before wedding)
— Printing: October 2, 2023 – October 16, 2023 (2 weeks; digital printing)
— Shipping: October 16, 2023 – October 23, 2023 (1 week; padded just to be safe!)
— In-Hands for Assembly: October 23, 2023 (1 week before mailing)
— Mail: October 27, 2023 (12 months before wedding)
Invitations
— Get Started / Inquire: February 26, 2024 (8 months before wedding)
— Printing: July 1, 2024 – July 22, 2024 (3 weeks; letterpress)
— Shipping: July 22, 2024 – July 29, 2024 (1 week; padded just to be safe!)
— In-Hands for Assembly: July 29, 2024 (1 week before mailing)
— Mail: August 2, 2024 (12 weeks before wedding)
Day-of Stationery
— Get Started / Inquire: August 26, 2024 (8 weeks before wedding)
— Printing: September 23, 2024 – October 7, 2024 (2 weeks; digital printing)
— Shipping: October 7, 2024 – October 14, 2024 (1 week; padded)
— In-Hands: October 14, 2024 (2 weeks before wedding)
Thank You Cards
— Get Started / Inquire: August 26, 24 (8 weeks before wedding — with day-of)
— Printing: September 23, 2024 – October 7, 2024 (2 weeks; digital printing)
— Shipping: October 7, 2024 – October 14, 2024 (1 week; padded)
— In-Hands: October 14, 2024 (2 weeks before wedding — with day-of)
— Mail: November 8, 2024 (2 weeks after wedding)
Feel free to copy this template to create your own stationery timeline! All you have to do is fill in the blanks and you’ll be all set.
Troubleshooting Your Stationery Timeline
If you run into trouble planning your stationery timeline, or if it’s just a little too overwhelming for you — that’s okay! If that’s how you feel, I recommend working with a professional wedding stationer to help guide you through the stationery process.
Hiring a wedding stationer can be really helpful when it comes to relieving some stress and anxiety from your big day! They’ll work with you from the very beginning to plan all of your stationery needs. And guess what? They’ll even help build your stationery timeline for you!
As you think about working with a wedding stationer, don’t be shy about asking them if this is something they can do for you. Most stationers will be happy to help! If not, maybe they just aren’t the right fit for you, and that’s okay.
Let’s Create Your Wedding Stationery (and Timeline) Together!
So, take your time and feel free to reach out to wedding stationers whenever you’re ready. I know I would be more than happy to help you with your wedding stationery needs. (:
If that feels like a good fit for you, you can learn more about how we can work together on my website! I offer custom and semi-custom wedding stationery for engaged couples across the country. No matter where you are located, I’d love to create wedding stationery that is the perfect reflection of you. Plus, I’ll create your timeline for you, so you don’t have to worry about a thing!

There are so many ways to bring your style into your wedding day. One of the easiest ways to make your wedding stand out is through your wedding stationary. No matter your vision; Basic invite has a wedding template for you!
There are a lot of different wedding stationary websites out there, but none compare to Basic Invite. I highly recommend checking them out when comparing all the different stationary sites. They offer tons of amazing semi-custom options for save the dates, invites, menus, and even thank you cards.
Basic Invite
Basic Invite is one of the few websites that gives you almost unlimited color options. All you have to do is select a design, and then you can change the color of each element on your card. Your wedding stationary can match any vision; you’re able to choose from over 180 colors. That’s so many more colors than other online stationary companies! If you want to add a little extra pop to your stationary; Foil cards are available in gold, silver, and rose gold. Customers can choose flat or raised foil on all of Basic Invite’s foil designs. Even though you are choosing a Basic Invite wedding template, it is so easy to customize it to be fully unique to you.
As you are designing, Basic Invite offers instant previews online so you can see the final look throughout your design process. With Basic Invite you can even order a printed sample of your invitation before you place your final order. You are able to feel the paper quality and check that the the colors printed the way you wanted. Ordering a sample of your design can be such a lifesaver because you’re able to double check the print and even spell check without ordering hundreds of copies first.

Elevate Your Wedding
A great way to elevate your wedding experience for guests is by providing a printed wedding ceremony itinerary or by choosing a place cards wedding template to use. Basic Invite allows the opportunity to carry a design throughout so many little details of your day to truly tie it all together.
Usually these are items couples skip because they add an additional cost, however Basic Invite is currently offering 15% off with coupon code: 15FF51

For more info on Basic Invite connect with them on Pinterest or Instagram.
2023 is off to a great start! 2022 brought so many cool and unique themes and trends to the wedding industry. I am so excited to see what my 2023 weddings have in store. With that being said, there are definitely a few 2023 trends I am excited to capture as the Spring season approaches and kicks off weddings for the year!
Bridesmaids in Color
I am predicting that color will play a huge role in weddings this year. Having your bridesmaids all in different colors within the same color scheme is absolutely beautiful and it photographs incredibly well! It also makes it easy to bring a variety of color into different aspects of your wedding day, like florals and decorations.


Florals
Florals are going to be BIG this year. Not just in the sense of popularity, but also in size! I anticipate seeing large, beautiful floral centerpieces, isle displays, backdrops, and statement decor. Whether intricate, or simple, florals are a wonderful way to enhance the style of your wedding!


Statement Pieces
Cocktail wall? Neon Signage? Favor Stand? Multi Colored Arches? It all makes the list! Any kind of unique statement piece that is used to help set your wedding apart from others will be a big hit this year.

Guest Book Alternatives
Traditional guest books are still wonderful and help capture who was there to help you celebrate your big day! But guest book alternatives are growing in popularity and I think they will play a huge role in weddings this year. Some unique guest book alternatives I’ve seen are a voicemail guest book, a polaroid guest book, and having guests sign bottles of wine for you to drink on your 1st, 5th and 10th year wedding anniversaries.


Outfit Changes
For some, picking out one dress is simply impossible. Why not wear two?! A trend I’m anticipating this year is the bride’s outfit change between the ceremony and reception! It could be from one elegant outfit to the next, or from one beautiful floor length gown into a short cocktail style dress. Whatever it looks like, it is so much fun, and helps really define the different phases of the day!


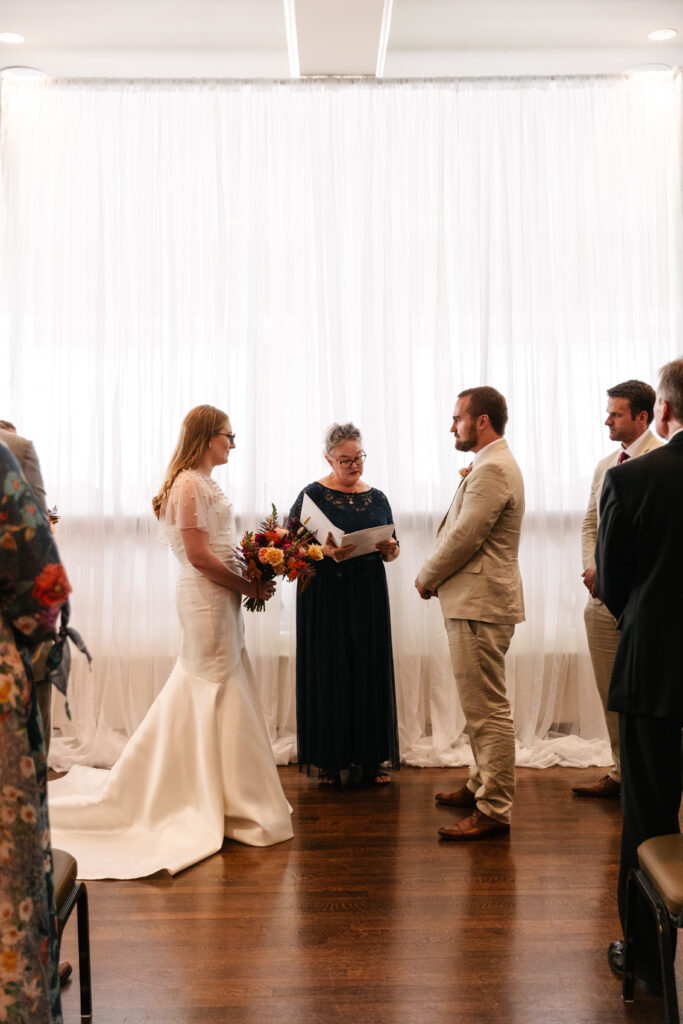
Personal Ceremonies
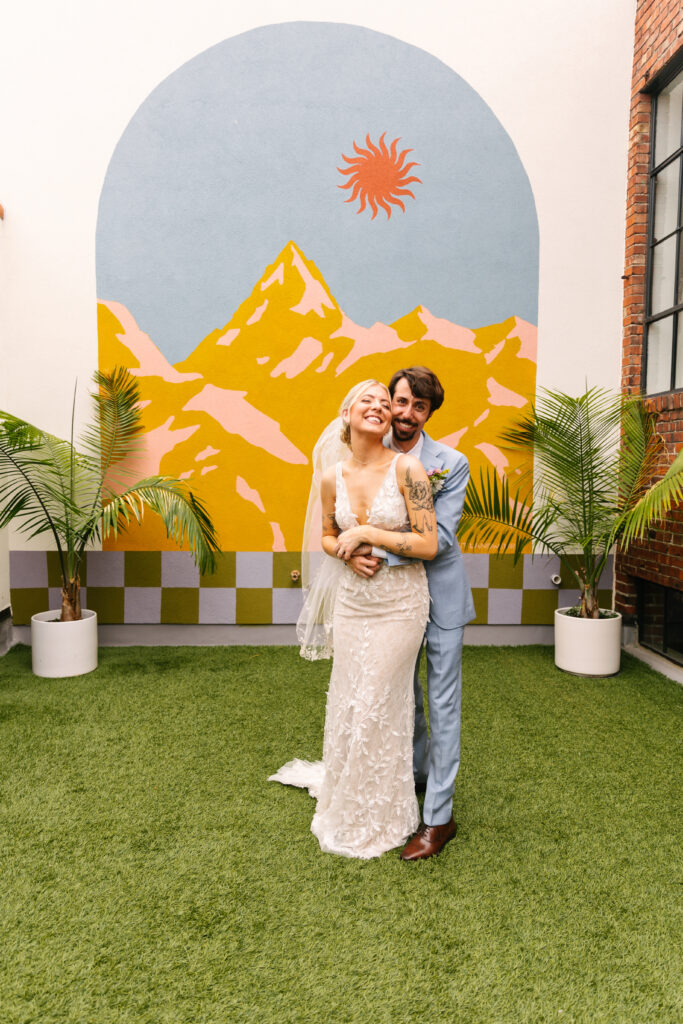
There has been a large trend toward having a close family member or friend officiate non-religious ceremonies. This tends to make the ceremony feel very personal! It allows the officiate to talk about personal memories and how they witnessed the couple’s relationship grow, firsthand. It creates a very intimate environment!


I am excited to document some of the 2023 wedding trends this upcoming season and am looking forward to seeing what new cool and unique themes and trends pop up for next year!

